Model Transformation
For the first part of this example we will be transforming a
toy growth model written in Python. Within the hackathon2018
repository directory this model is growth.py. The model takes
command line arguments defining the path to an input file and
an output file. The model then reads photosynthesis rates from
the input file, calculates the growth rate (incorrectly) and
then outputs the growth rate to the output file. You can run this
model from the command line using the following command:
$ python growth.py Input/photosynthesis_rate.txt Output/growth_rate.txt
Then you can take a look at the output produced by the model. We will be transforming this model so make a copy, adding your name to the end of the file.:
$ cp growth.py growth_mlang.py
Then move back up into the cis_home direcotry.
$ cd ../
Adding API Calls
The first step in transforming this model is to replace the calls reading/writing input/output from/to files with API calls that will instead receive/send input/output from/to the cis_interface framework. There is a cis_interface API in C, C++, Python and Matlab.
Importing the API
Since the test model is in Python, we first need to import the necessary classes, this can be accomplished with the line:
from cis_interface.interface import CisInput, CisOutput
This imports the Python API classes for connecting to input and output channels.
Connecting to Channels
Next we need to tell the model to connect to input/output channels. This can be done by replacing the lines:
filename_input = sys.argv[1]
filename_output = sys.argv[2]
with:
input = CisInput('photosynthesis_rate')
output = CisOutput('growth_rate', '%f\n')
The first call creates the input object that connects to a channel named
photosynthesis_rate. The second creates an output object that connects
to a channel called growth_rate that takes the form of a float followed by
a newline character.
Loop over input, run calculation, & send to output
The next step in our model loops over the input photosynthesis rates, calculating the growth rate. When we are using input from cis_interface, we will want to continue looping over input until the channel is closed. To do so we can use a while loop that only breaks when receivinga message from the interface fails. In addition, we will want to send each calculated growth rate to the output. This is accomplished by replacing the following lines:
# Load arrays from files
data_input = np.loadtxt(filename_input)

# Loop over photosynthetic rates, calculating growth
data_output = []
for prate in data_input:
    grate = 0.5 * prate
    print('growth: photosynthesis rate = %f ---> growth rate = %f' % (
        prate, grate))
    data_output.append(grate)

# Save data to output file
np.savetxt(filename_output, data_output)
with:
# Loop over photosynthetic rates, calculating growth
while True:
    # Receive photosynthetic rate
    flag, data_input = input.recv()
    if not flag:
        print('growth: No more input.')
        break
    prate = data_input[0]
    # Calculate growth
    grate = 0.5 * prate
    print('growth: photosynthesis rate = %f ---> growth rate = %f' % (
        prate, grate))
    # Send growth to output
    flag = output.send(grate)
    if not flag:
        raise Exception('growth: Error sending growth rate.')
Lets break this down into the important lines. The line:
flag, data_input = input.recv()
Is where the model is receiving data from the input channel. It returns a flag indicating whether or not the receive was successful and a tuple containing all of the received variables (in this case a single float). The flag will return False if the channel has been closed (usually if there is not any more input) or if there is an error. It can be used to break out of a loop over input. The calculation step, namely the line:
grate = 0.5 * prate
remained unchanged in the transformed code, illustrating that you can reuse the same code form the original model. For this example the calculation was very simple and could just be copied manually, but for more complex calculations as you would encounter with real models, you can import the existing code so it does not need to be replicated. Finally, the line:
flag = output.send(grate)
sends the calculated growth rate to the output channel and returns a flag that indicates if the send was successful or not. This flag should be checked to ensure that you do not continue looping in the event that the output channel was closed due to an error.
Registering Model
Next we will use the user-interface to register the model and connect it to some files to replicate the original behavior of the model. First, go to the user interface located here.

To register a new model, you will need to log in using your GitHub credentials in the upper left hand corner.

Once you are logged in, a new menu item will appear for adding a new model.

Clicking that menu option will pull up a form where you can enter information about your model.
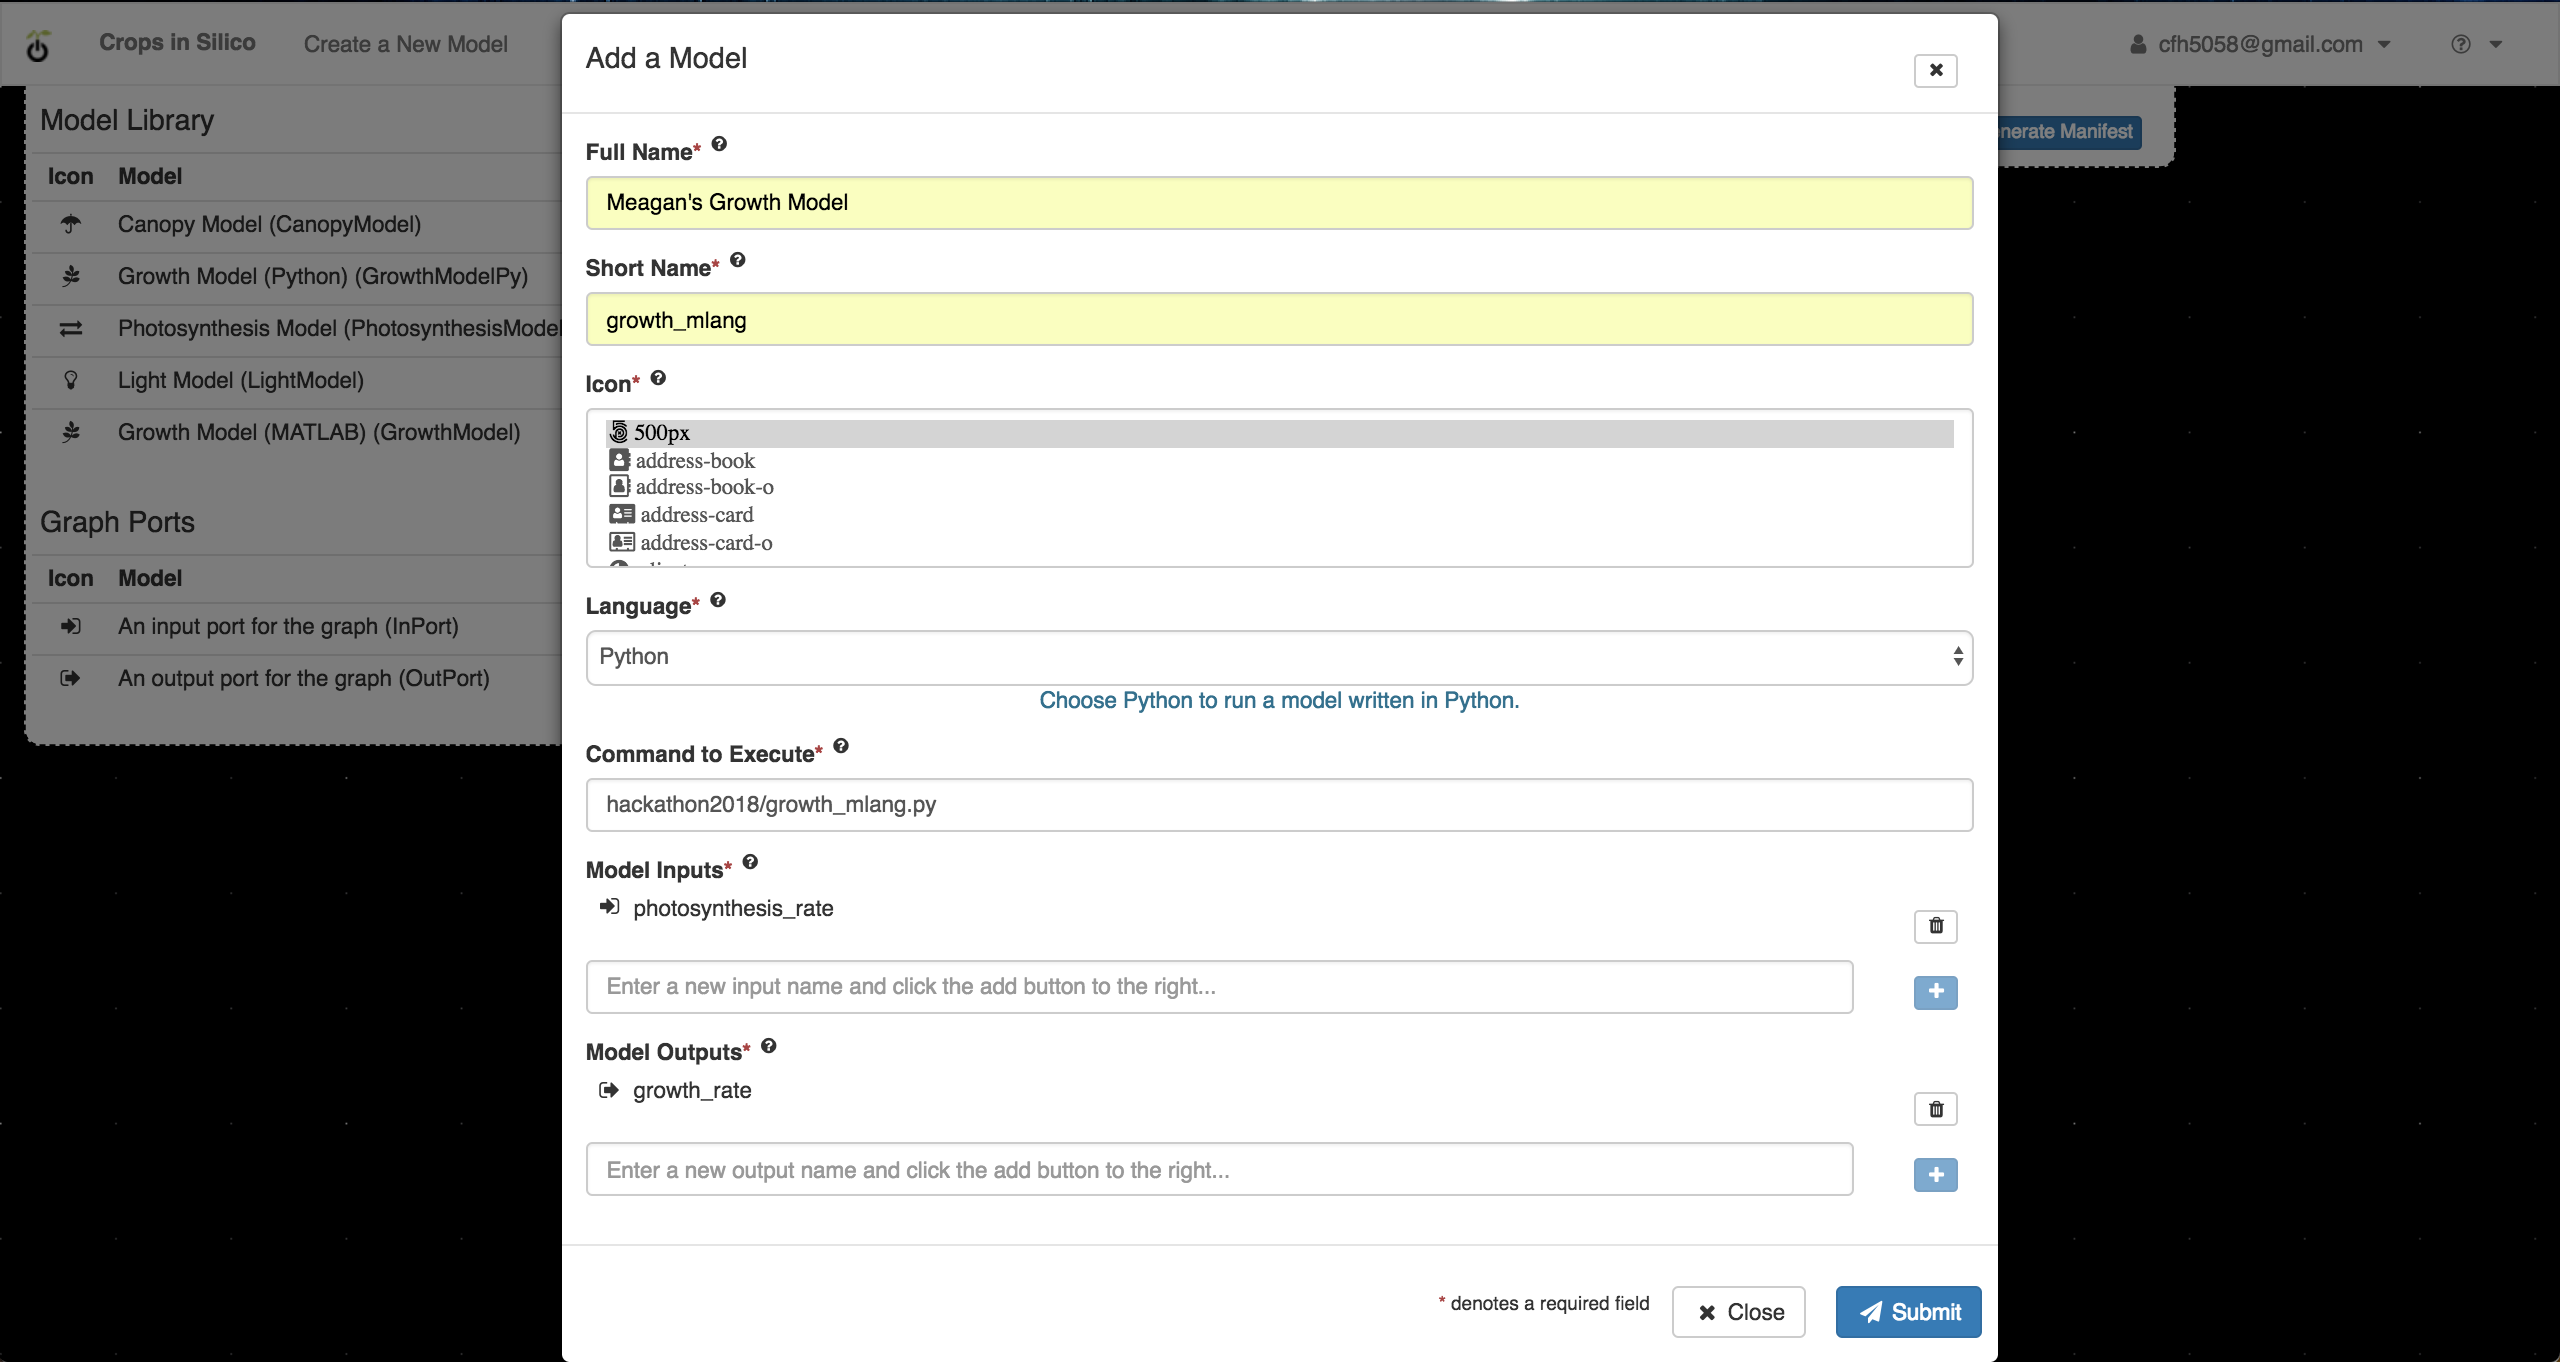
You can give your model any name, but make sure that you select Python as
the model language, use the name of your transformed model with the hackathon2018
directory included (e.g. hackathon2018/growth_mlang.py),
and the correct names of your input and output channels. For the example we have an
input channel called photosynthesis_rate and an output channel called growth_rate.
For the input and output channels to be added, you will need to click on the blue +
buttons after filling in the name. You can enter as many channels as your model requires,
but for now our model only requires one of each.
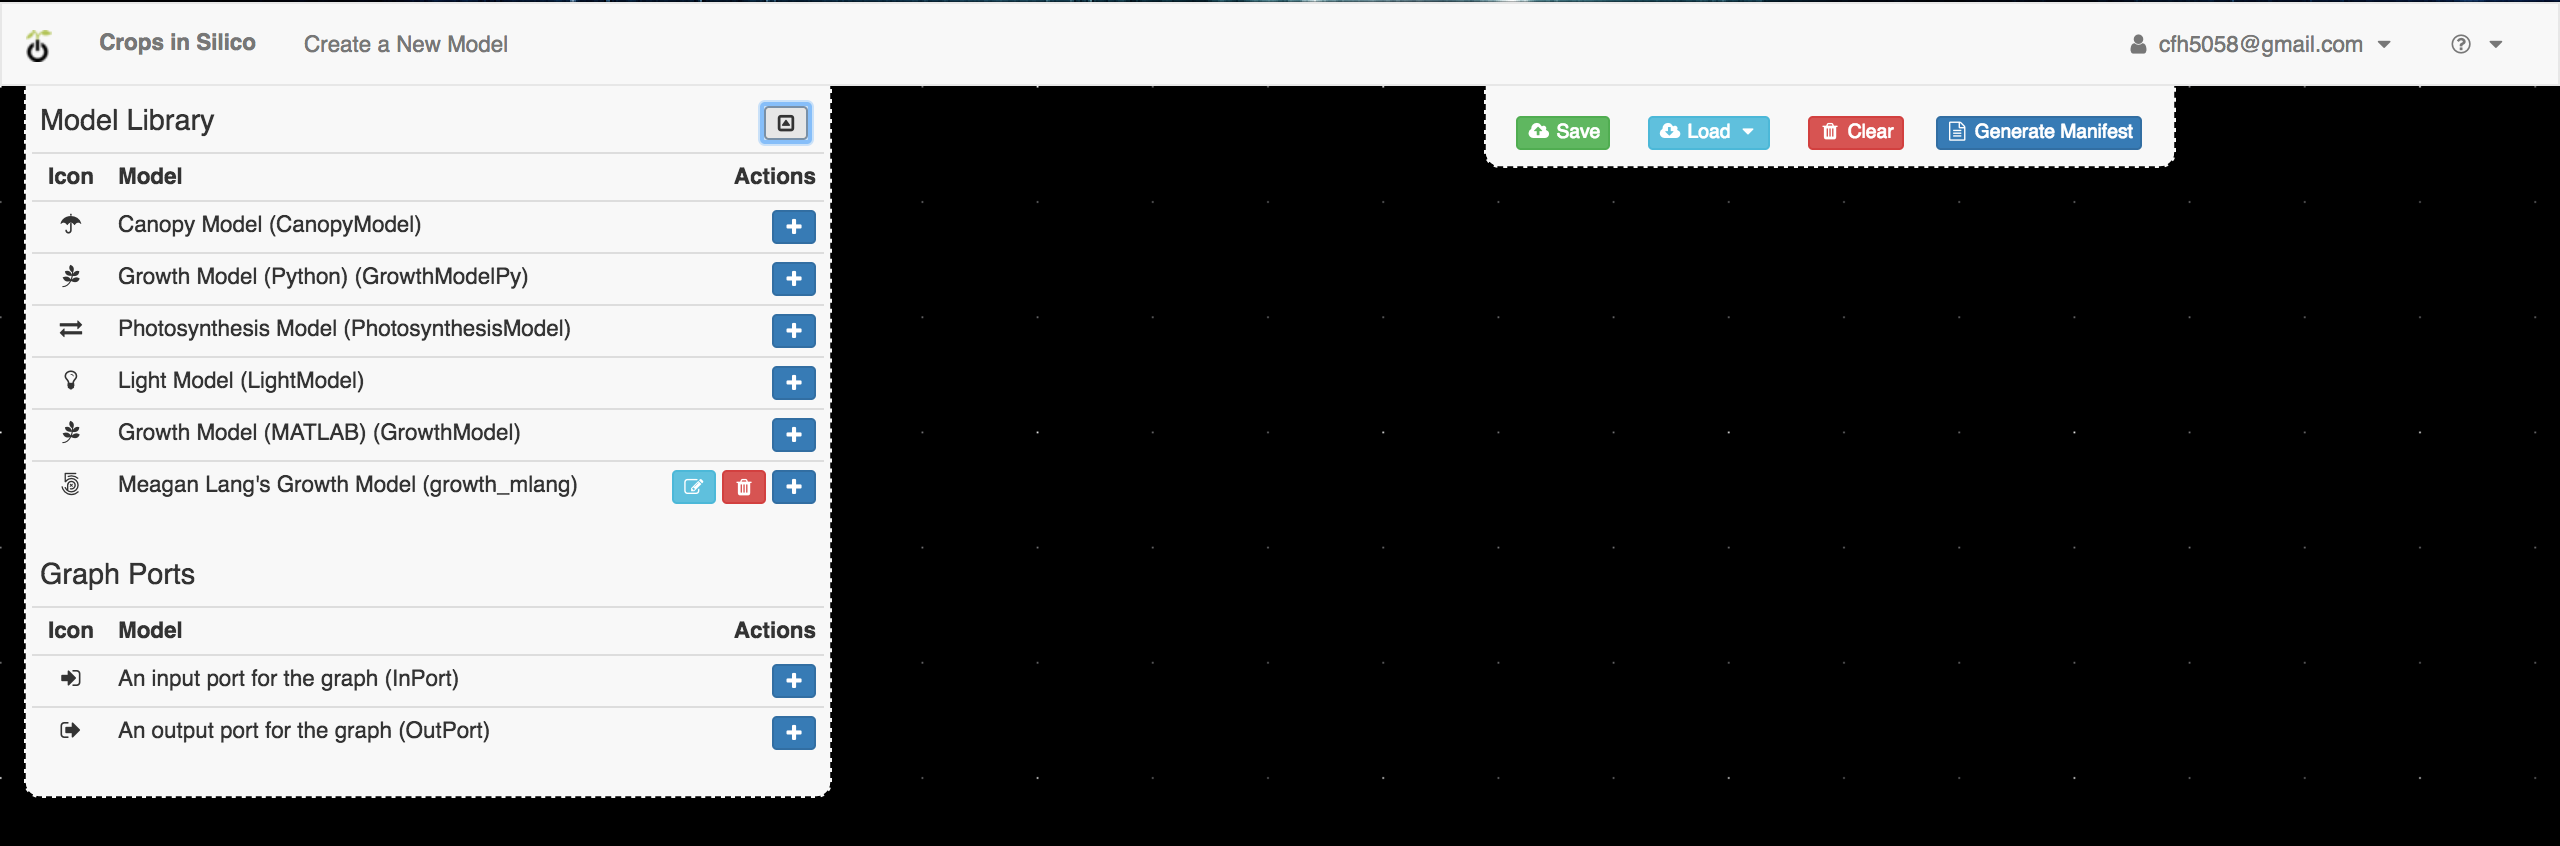
Once you have finished entering information for your model, you can save your model by clicking submit. Now, if you click on the magnifying glass,

you will see your model among those listed.
Connecting Models to Files
Now that we have added your model, we can create a network that connects your model’s input/output channels to files, essentially performing the same function as the original model.
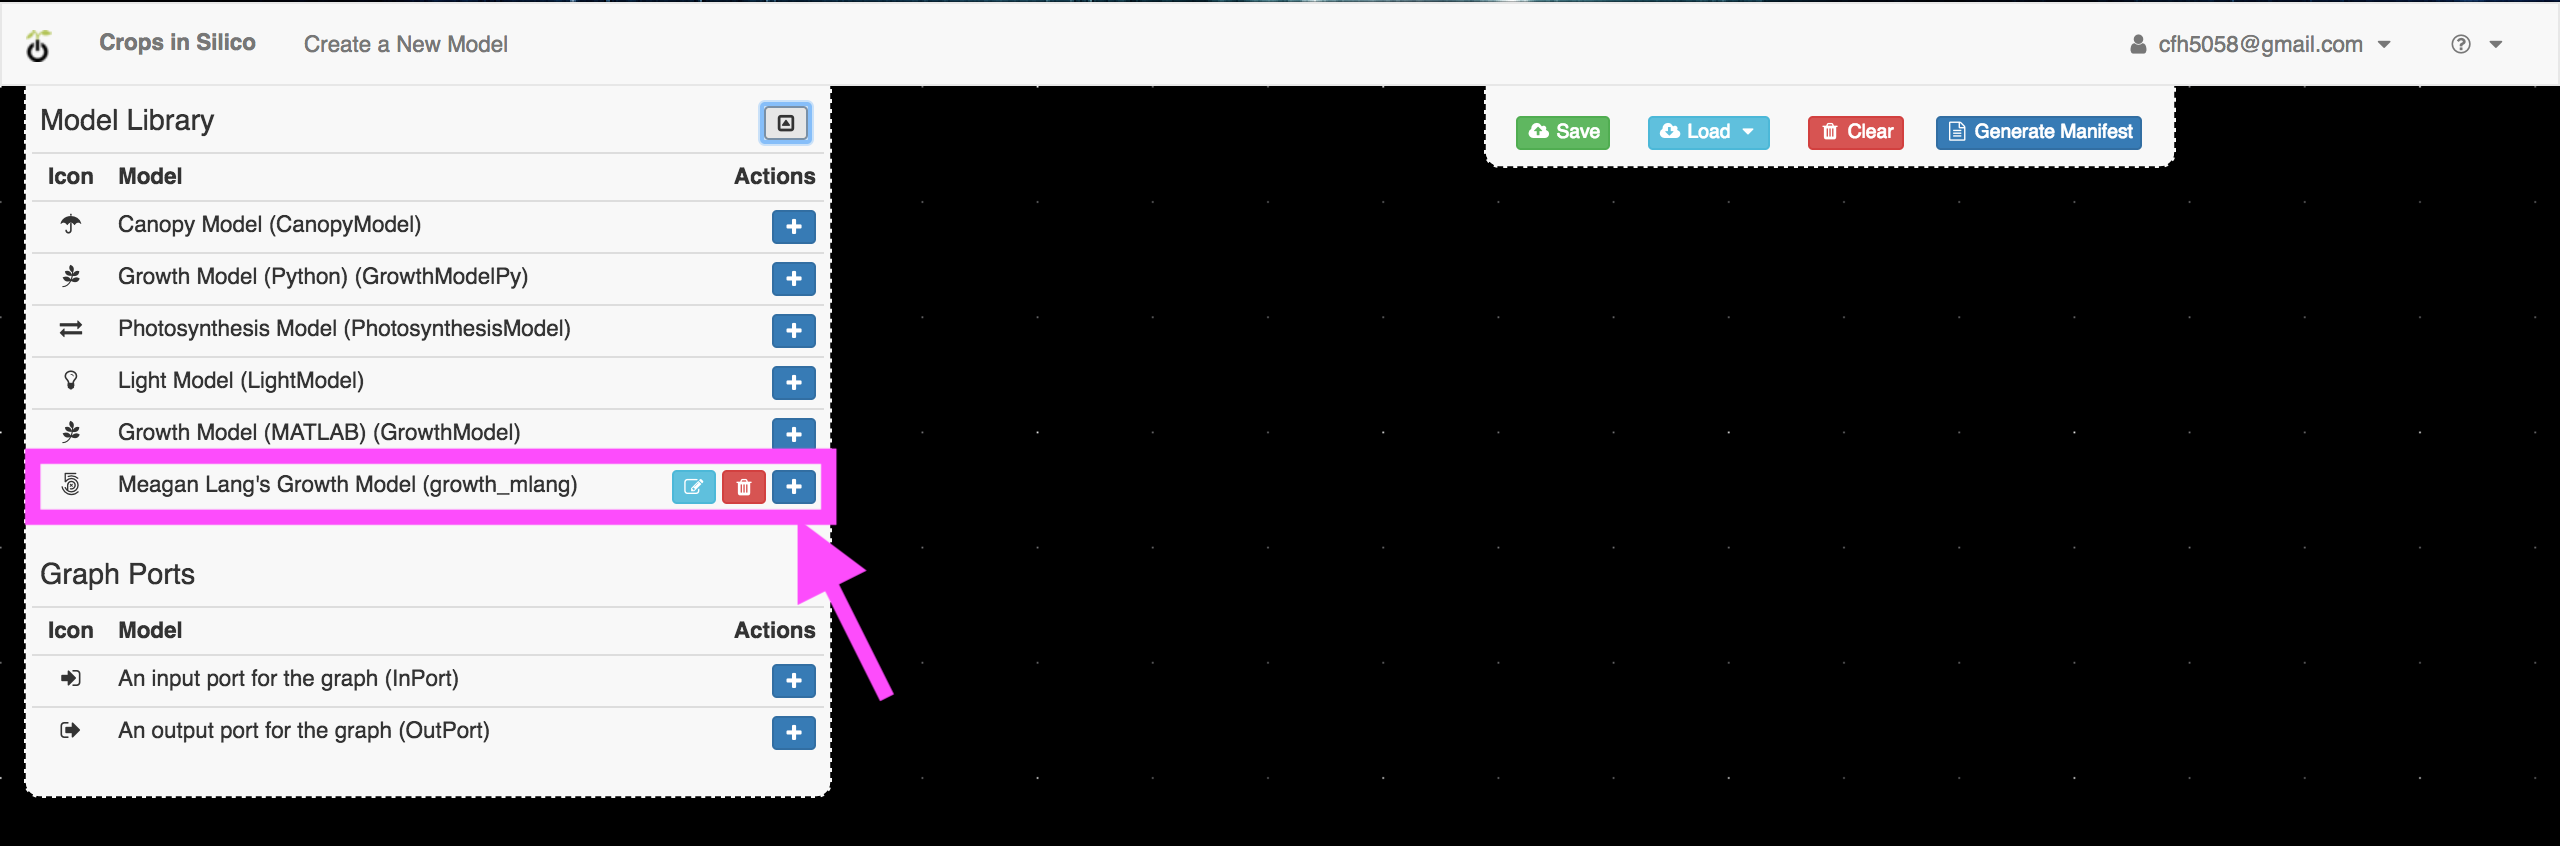
Adding Your Model
To add your model to the canvas, click the blue + button
next to your model in the model palatte.
Your model will then appear on the canvas.

Your model input and output channels are represented by white dots. Inputs are on the left and outputs are on the right. But we need something to connect them to.
Input File
First we will add an input file. From the model palette, select an input port.
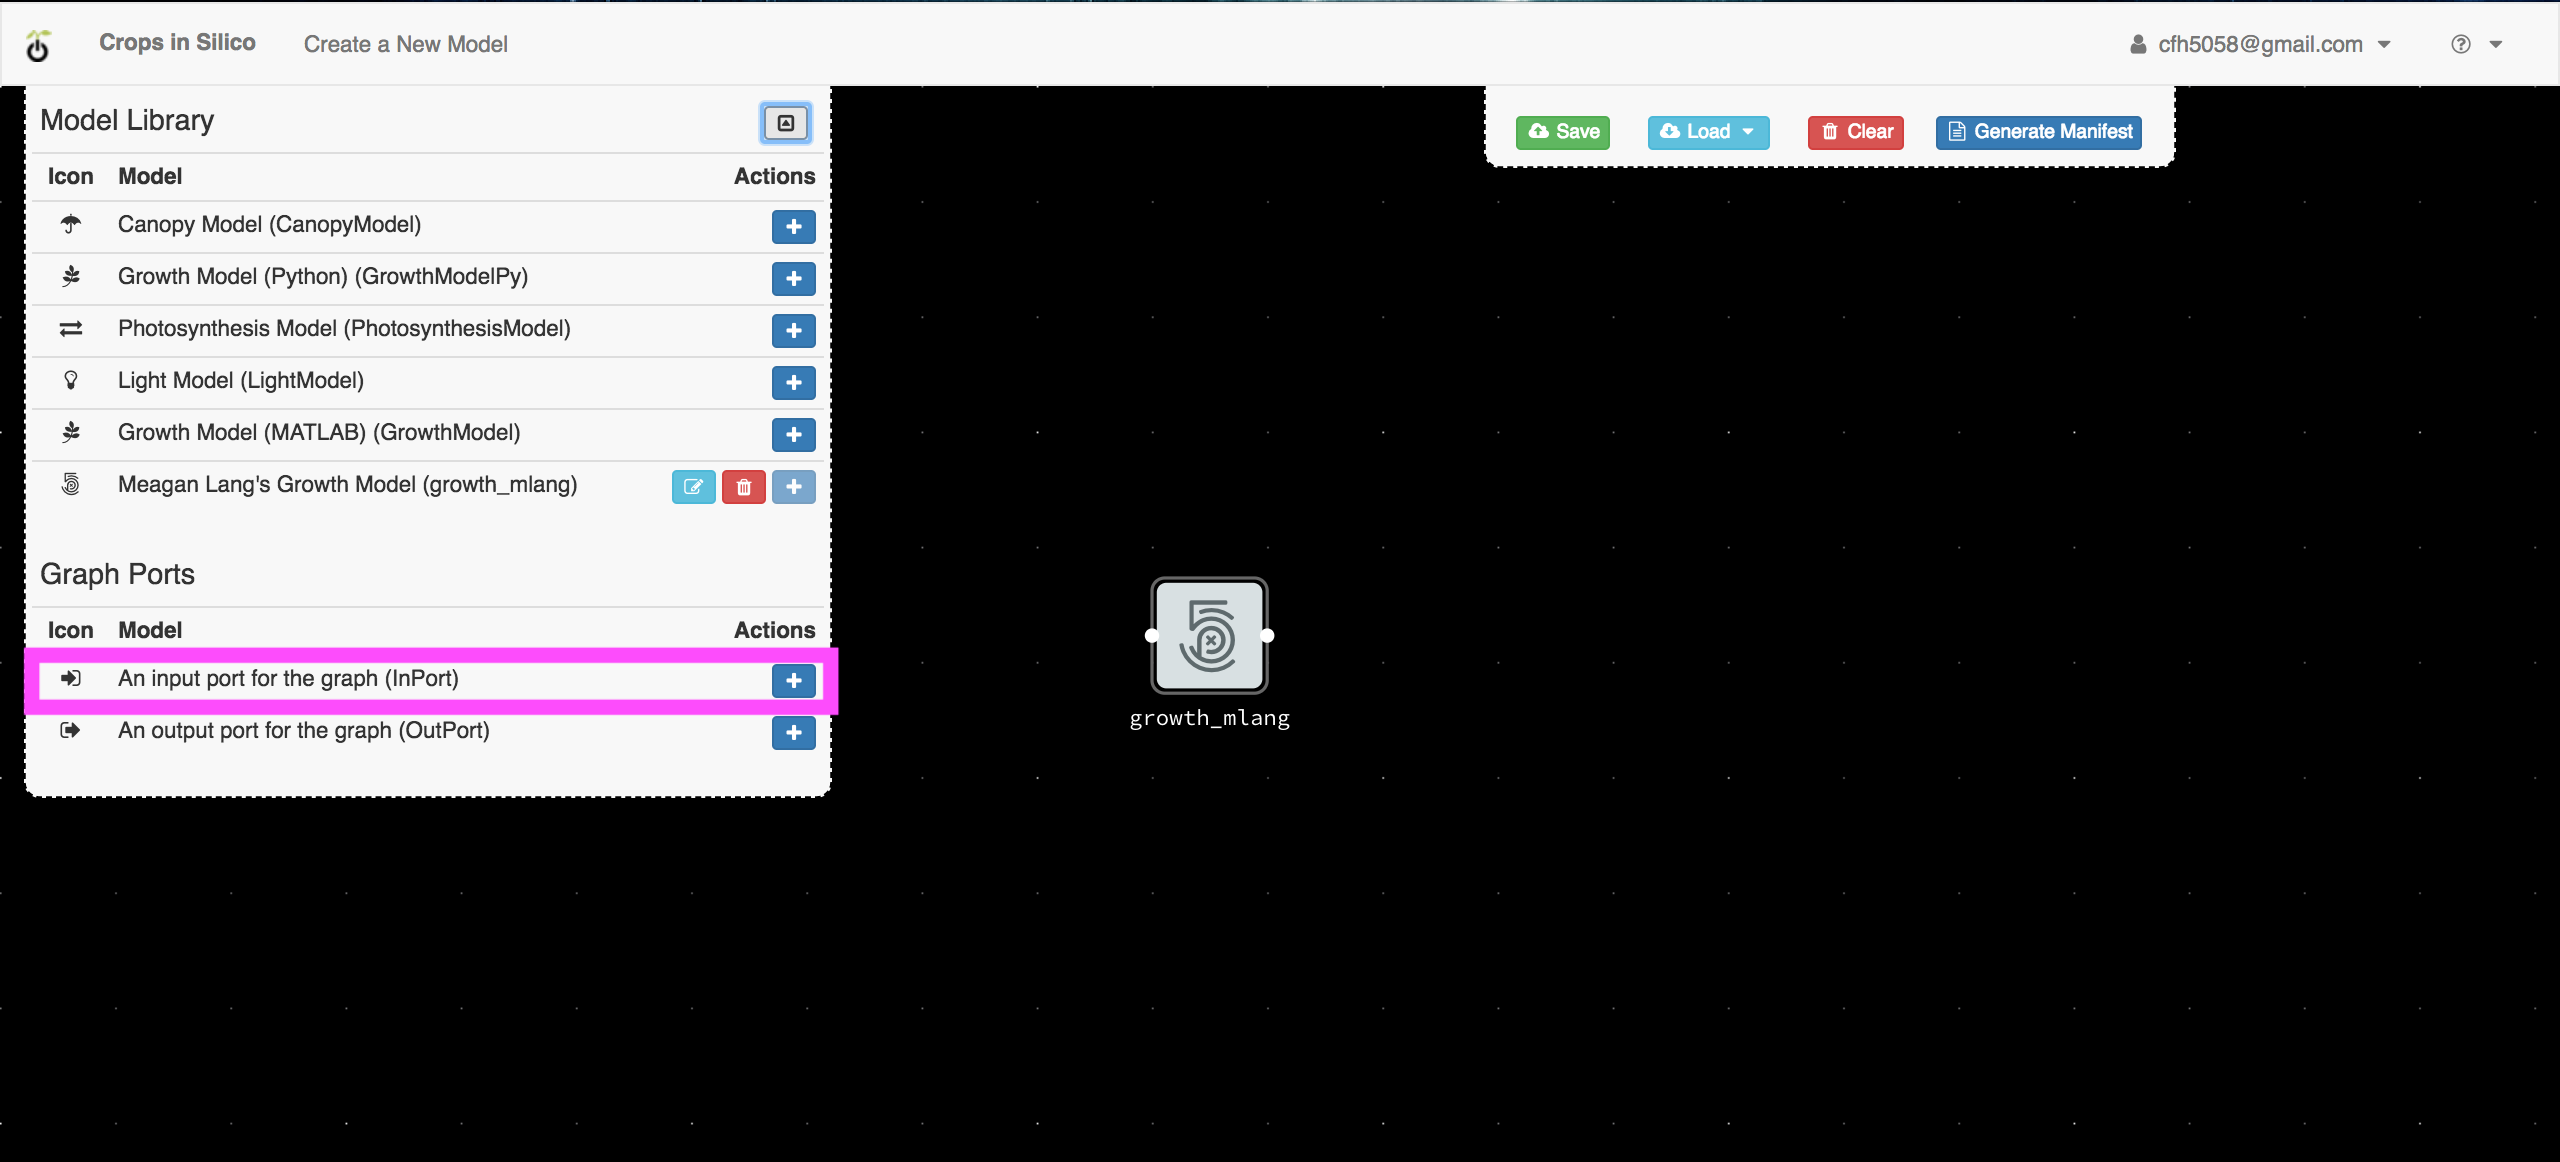
When you click the blue + button, an input port will be added to the canvas
and a form will pop up asking for information about the input port.
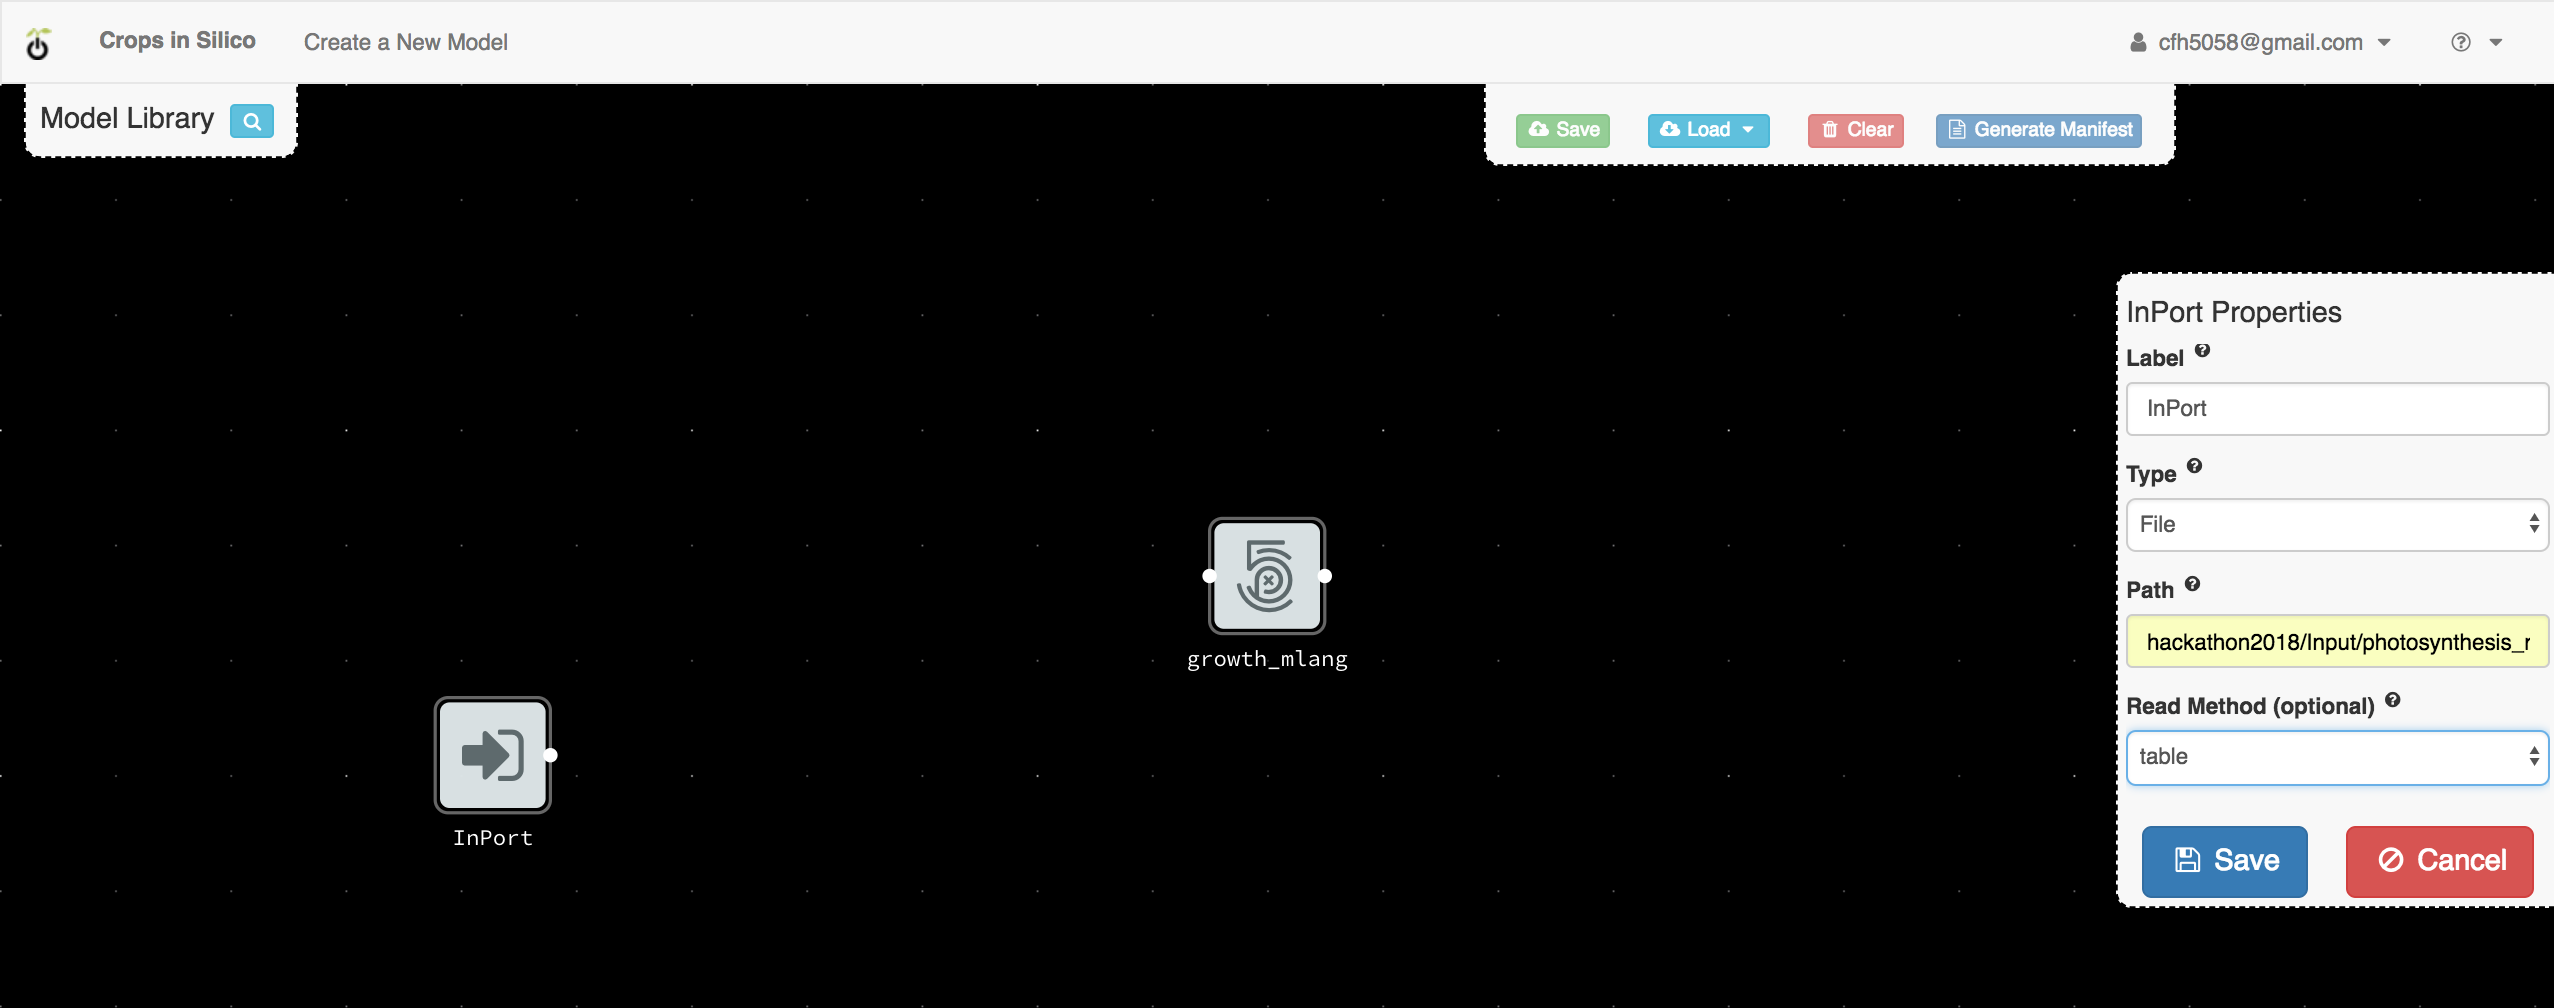
For this example
you should select the file type, a file name of
hackathon2018/Input/photosynthesis_rate.txt
and a read method of table. This tells the input port that it should read values
from a tab-delimited table line-by-line from the indicated file.
Output File
Next we will add an output file. From th emodel palette, select an output port.
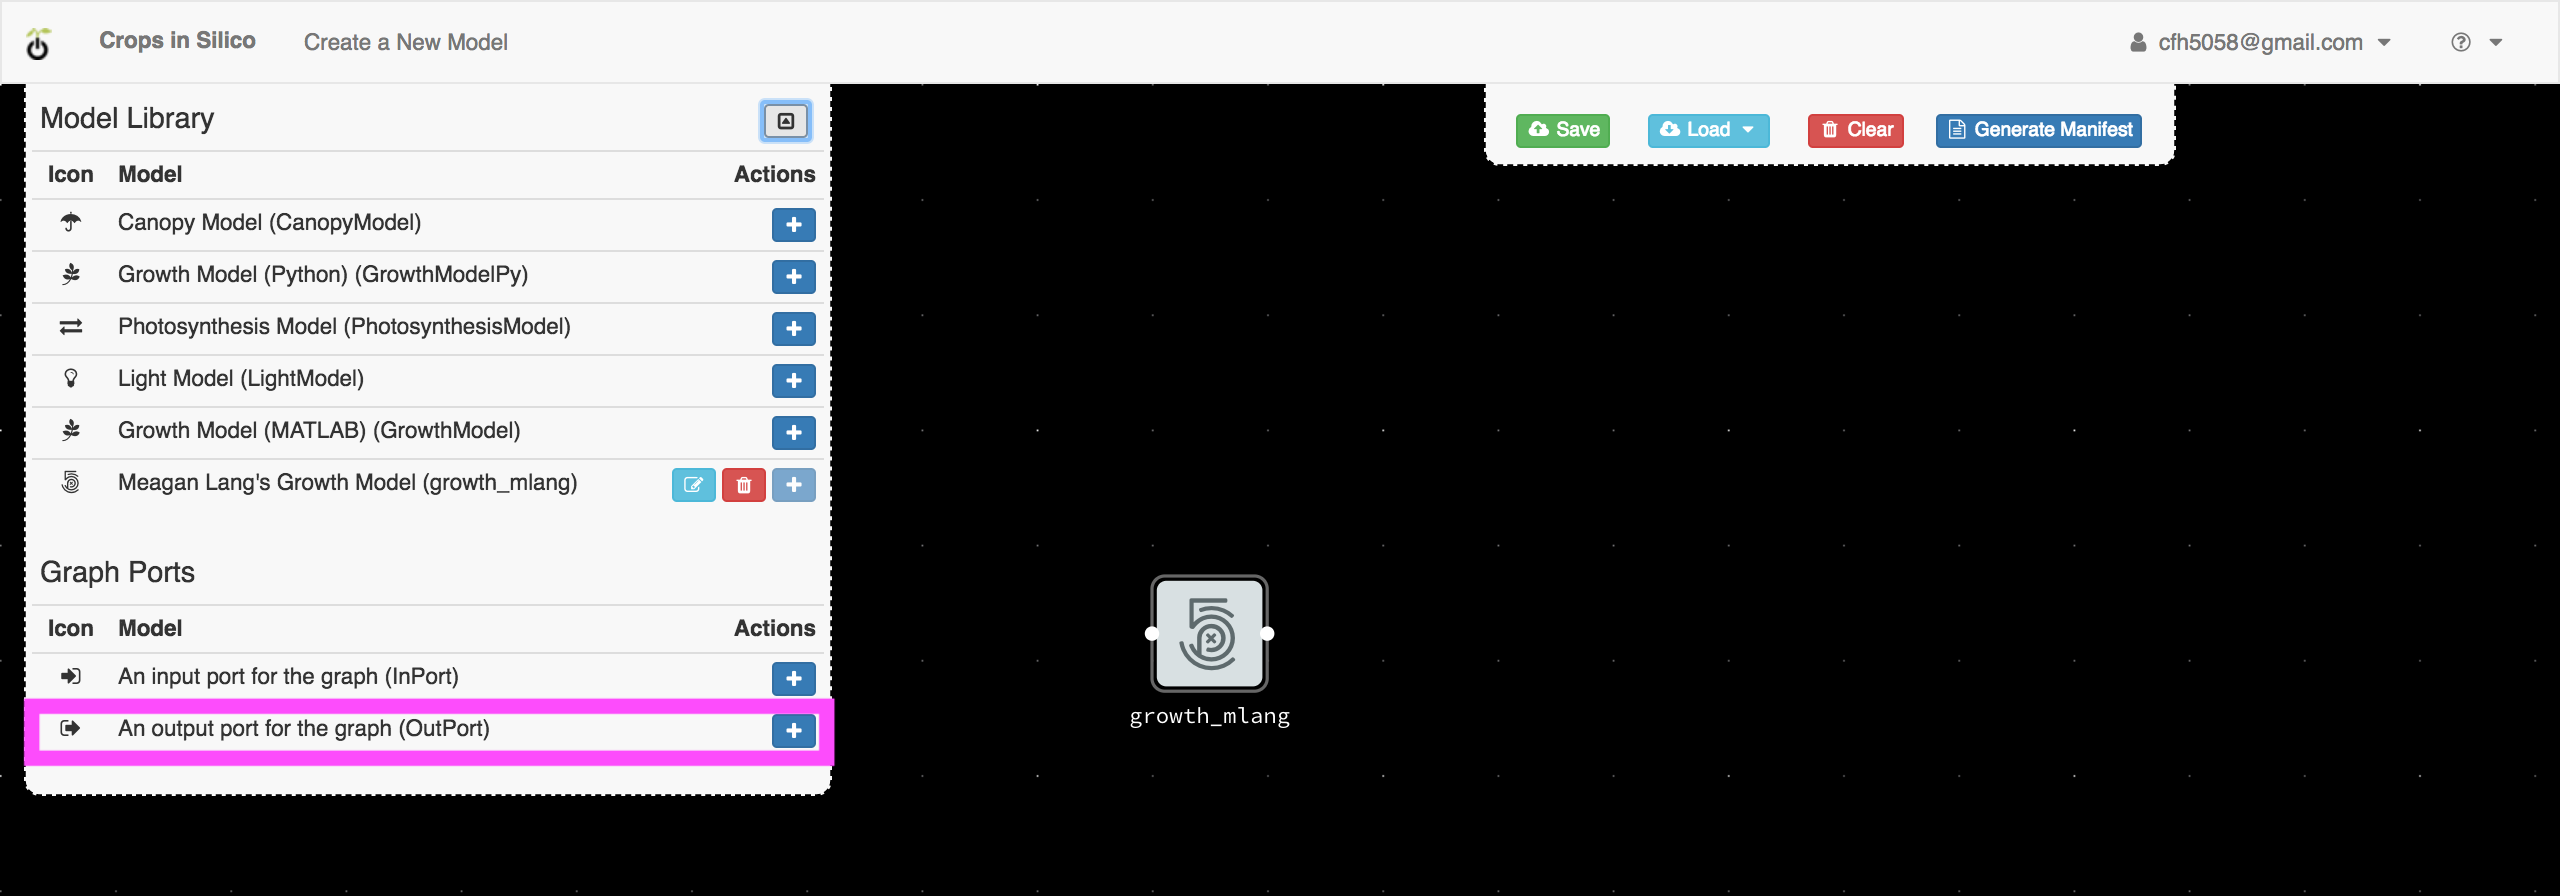
When you click the blue + button, an output port will be added to the canvas
and a form will pop up asking for information about the output port.
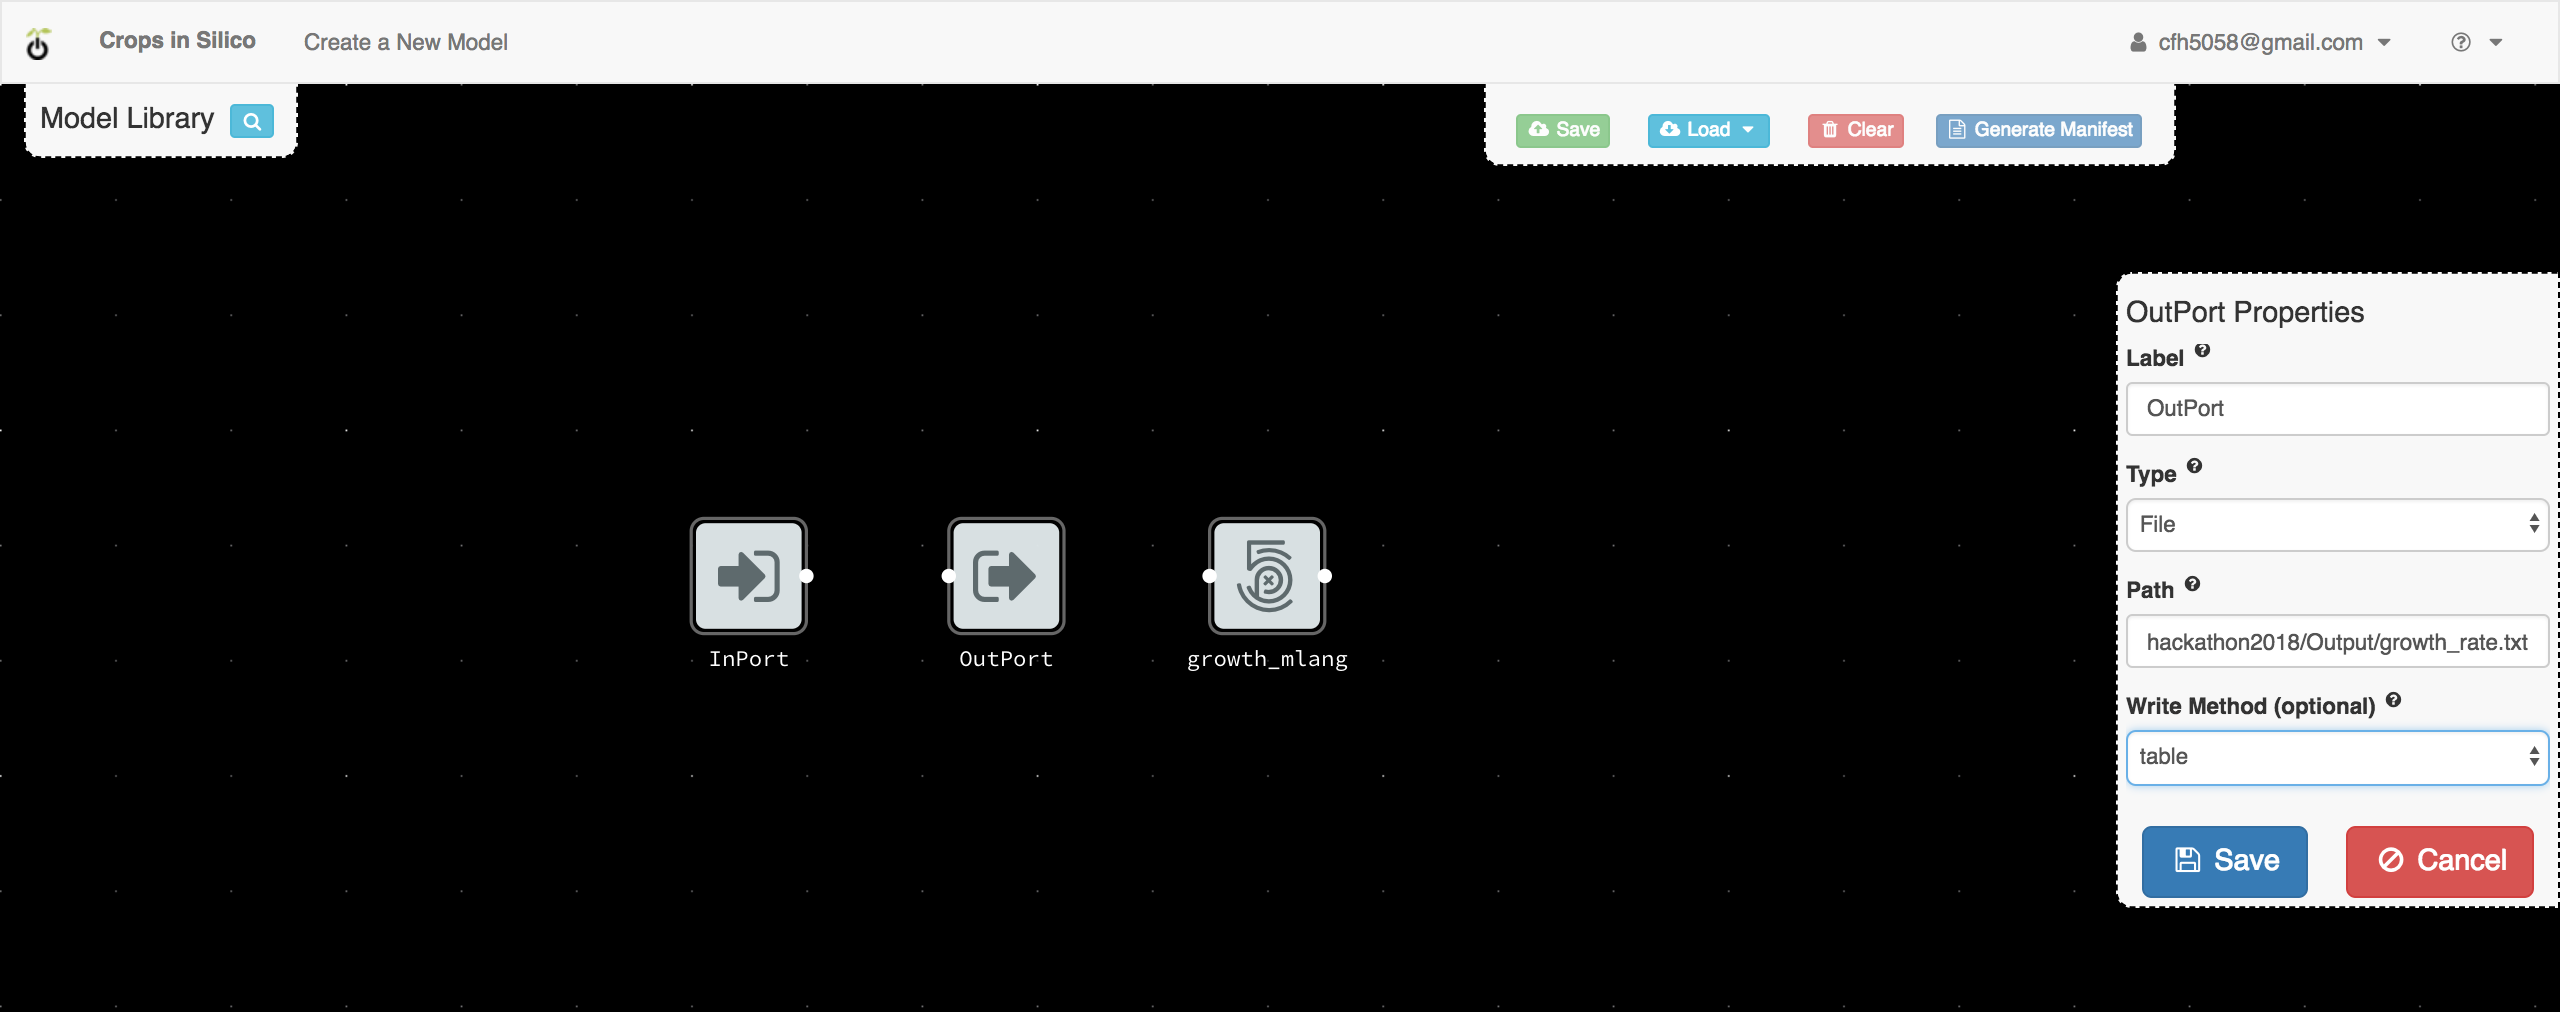
For this example
you should select the file type, a file name of
hackathon2018/Output/growth_rate.txt,
and a write method of table. This tells the output port that it should write values
to a tab-delimited table line-by-line in the indicated file.
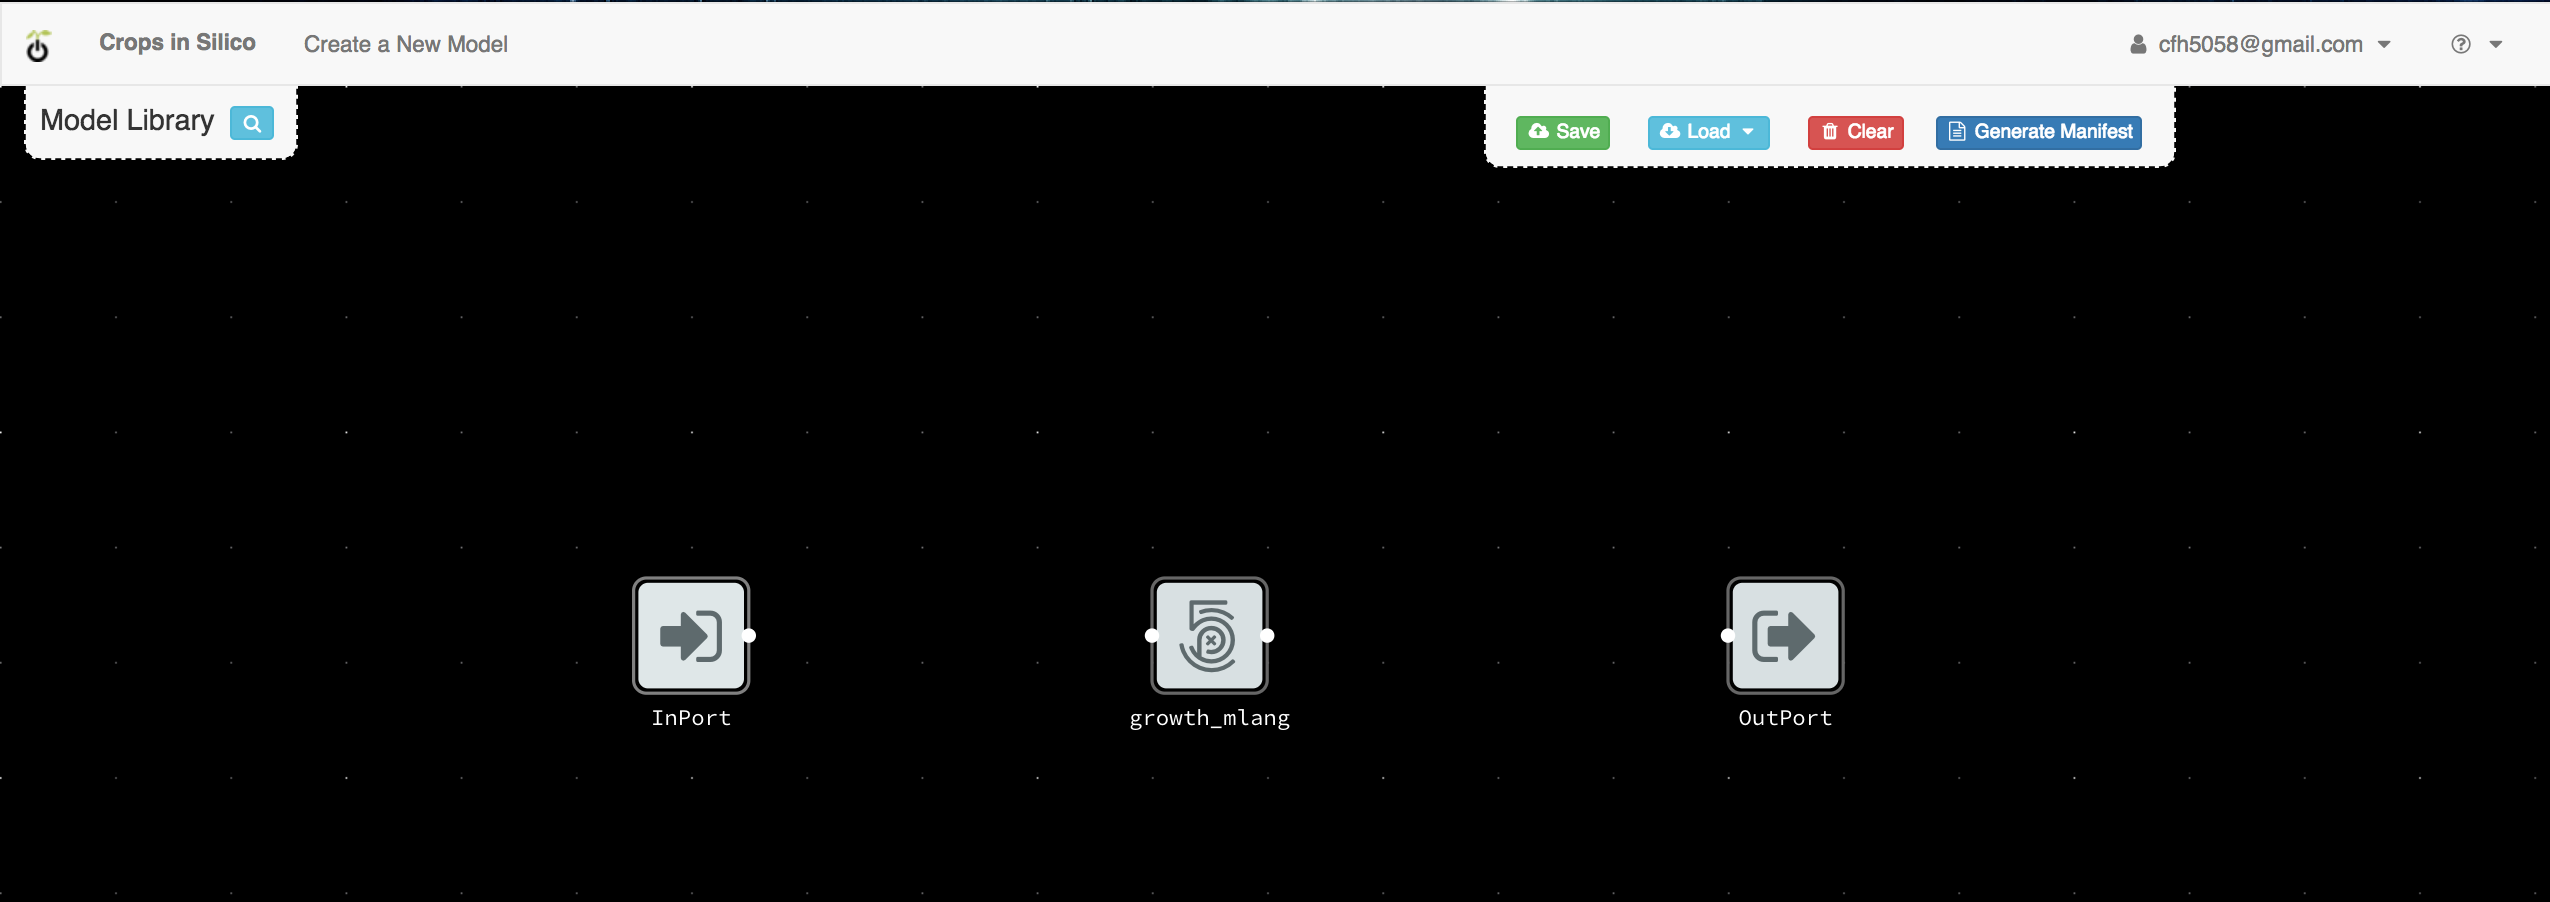
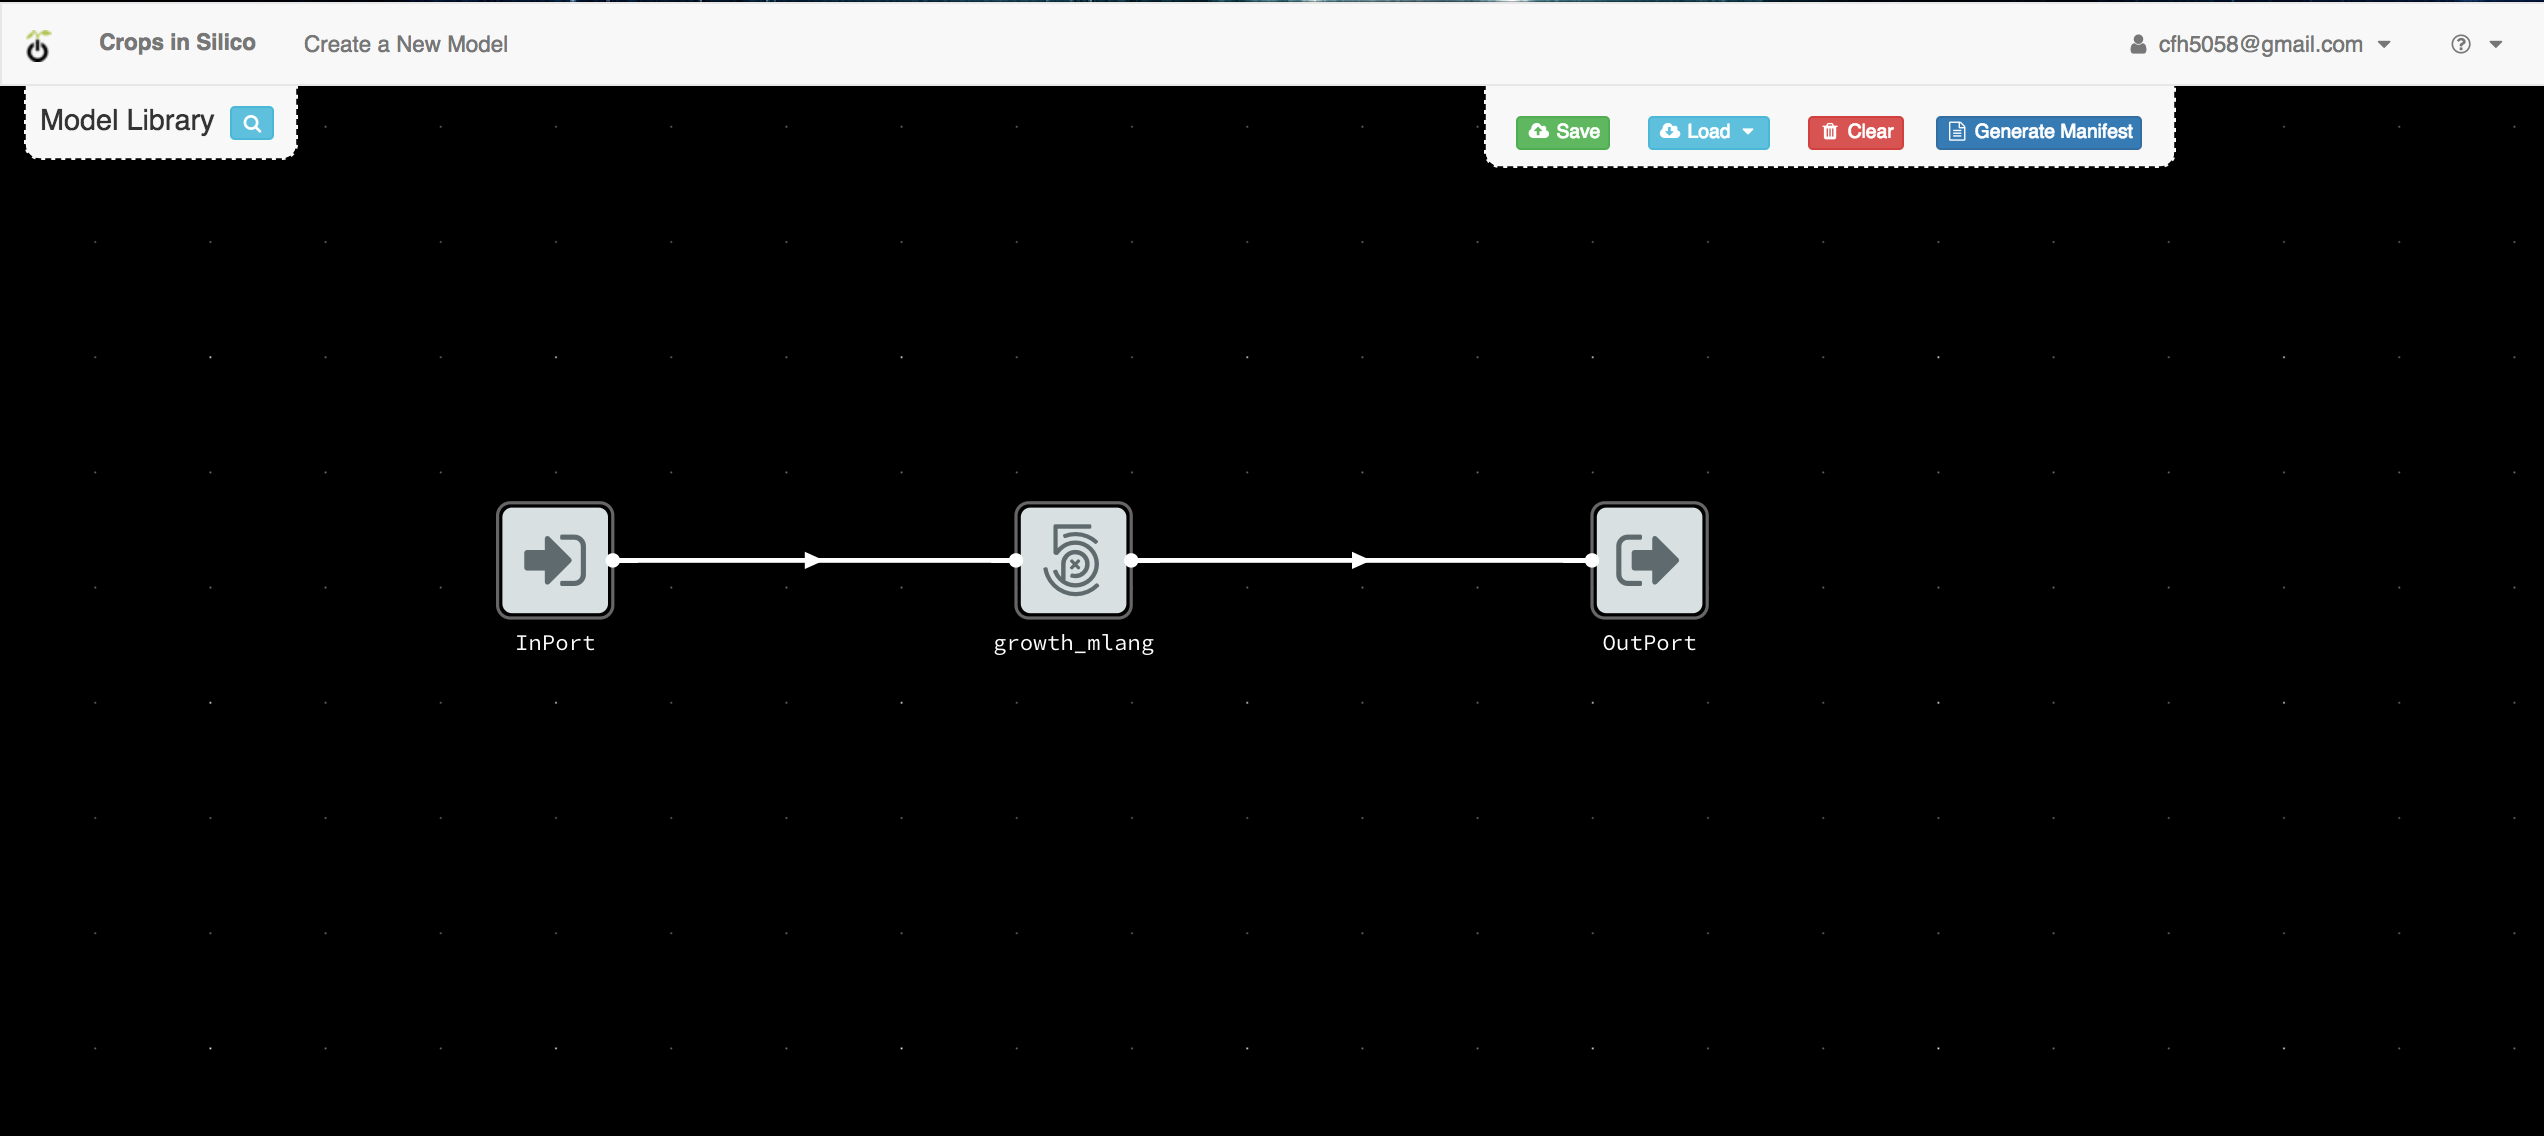
Making Connections
Now that we have added all of the necessary pieces, we need to connect them. You can rearange the different components on the canvas by dragging and dropping them. The following layout will make the connections easier to understand.
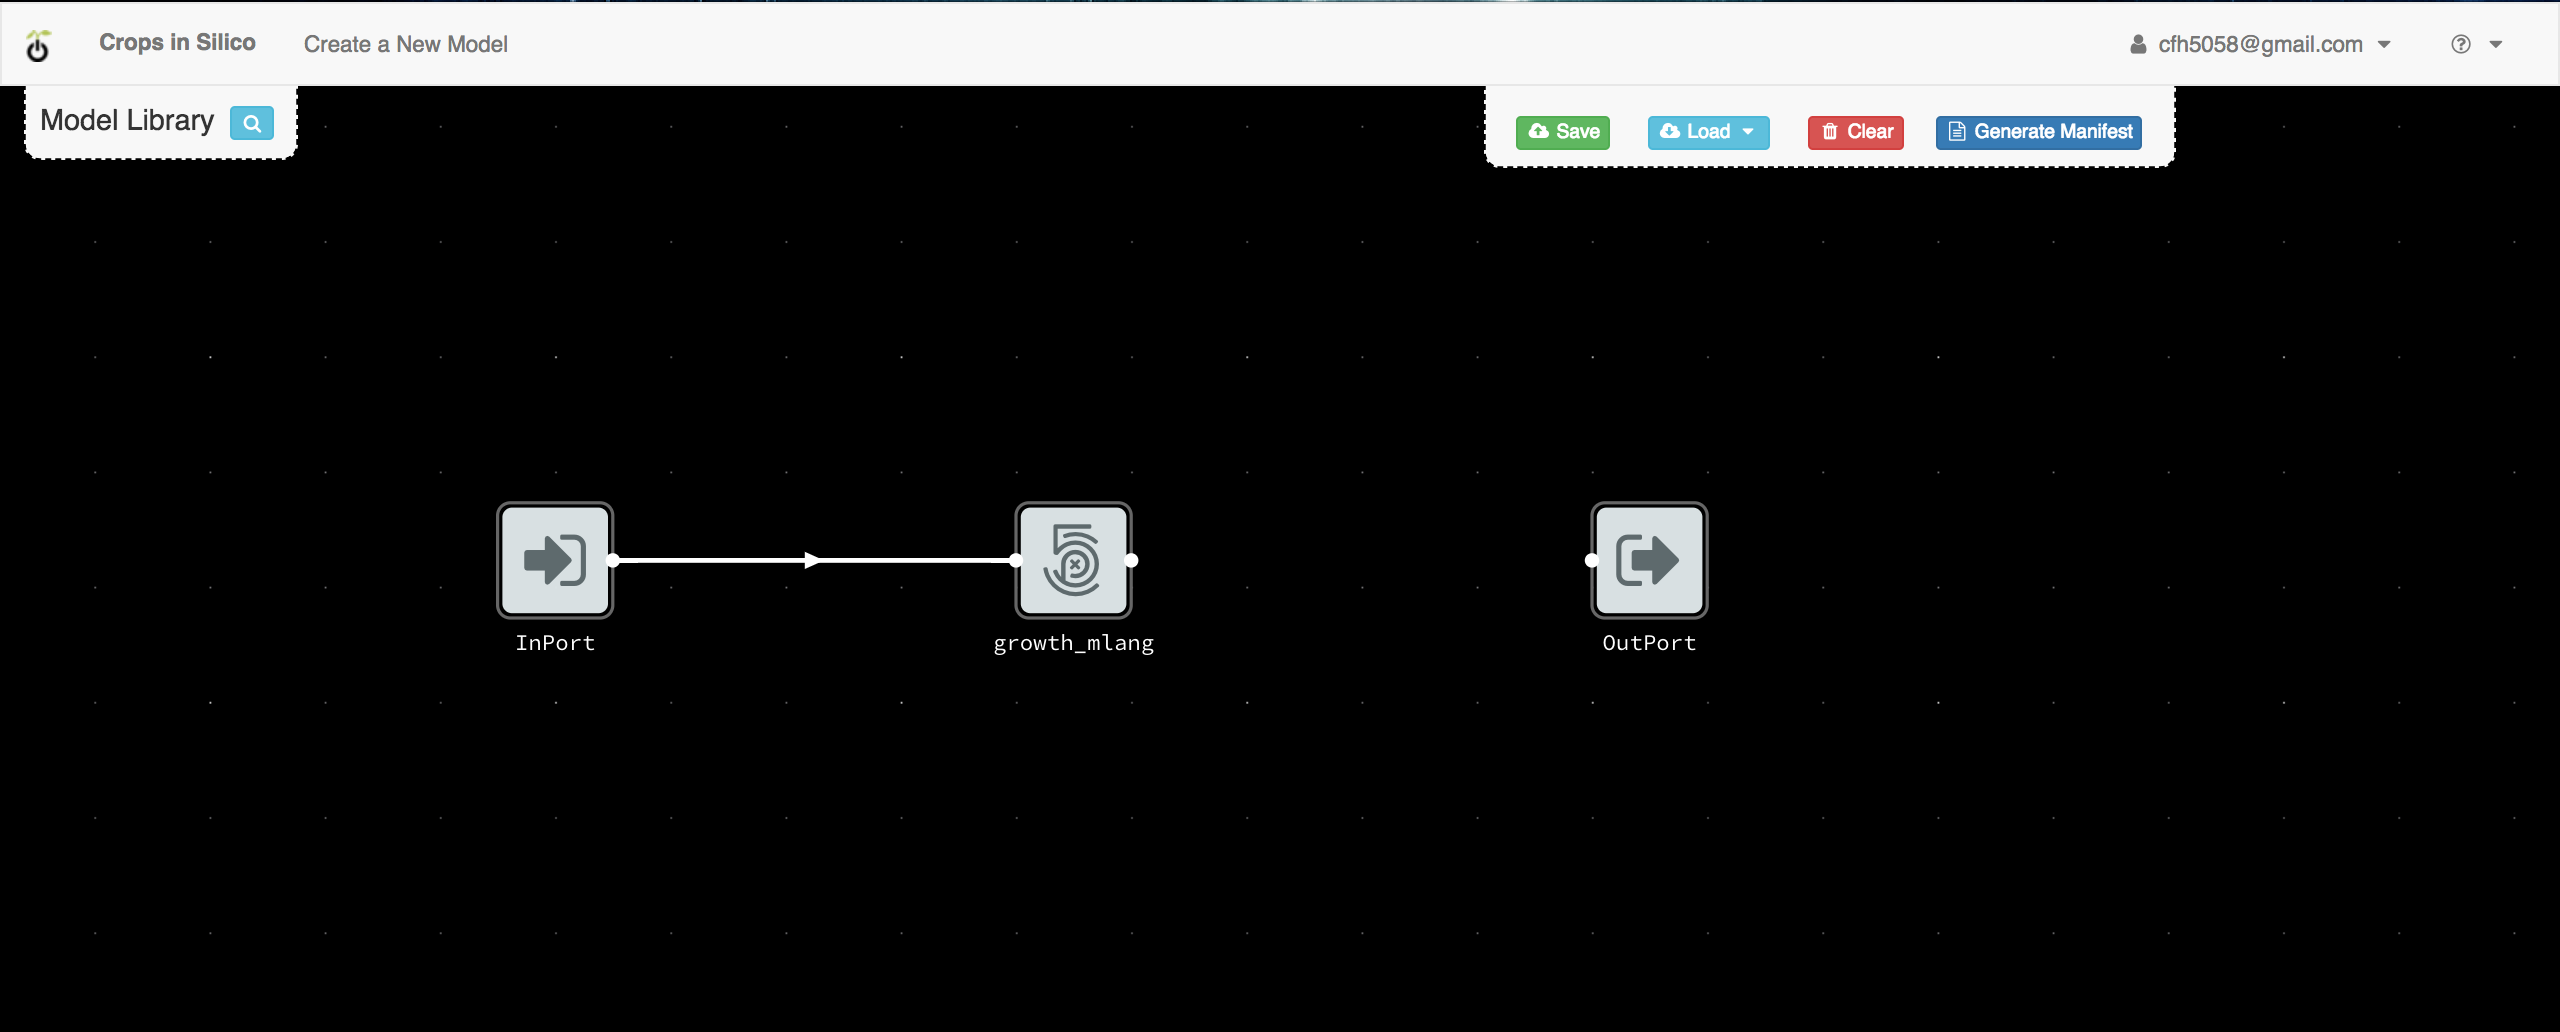
To make the input connection, click on the input port’s white dot
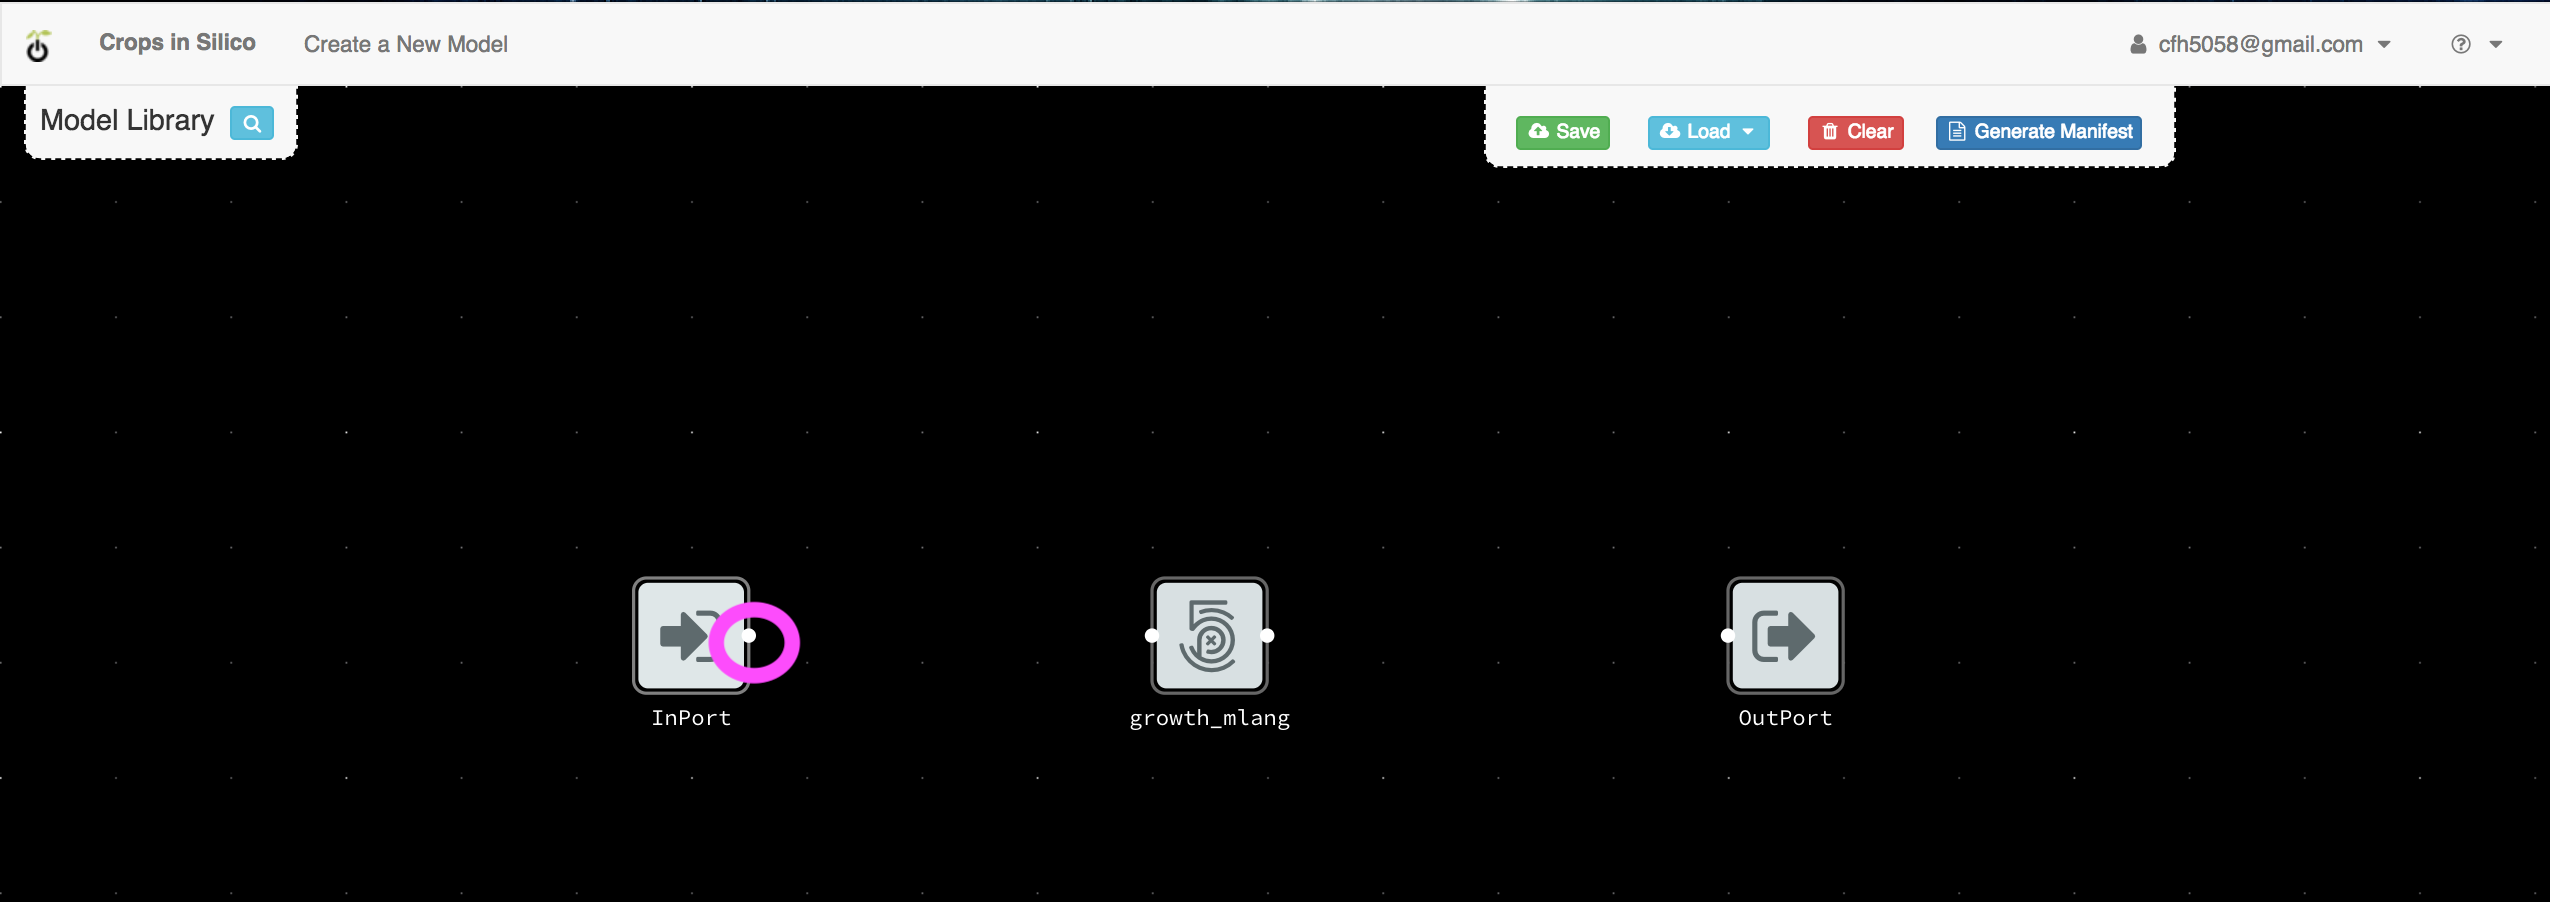
and then click on the input dot (on the left side) on your model.
To make the output connection, click on the output dot (on the right side) of your model
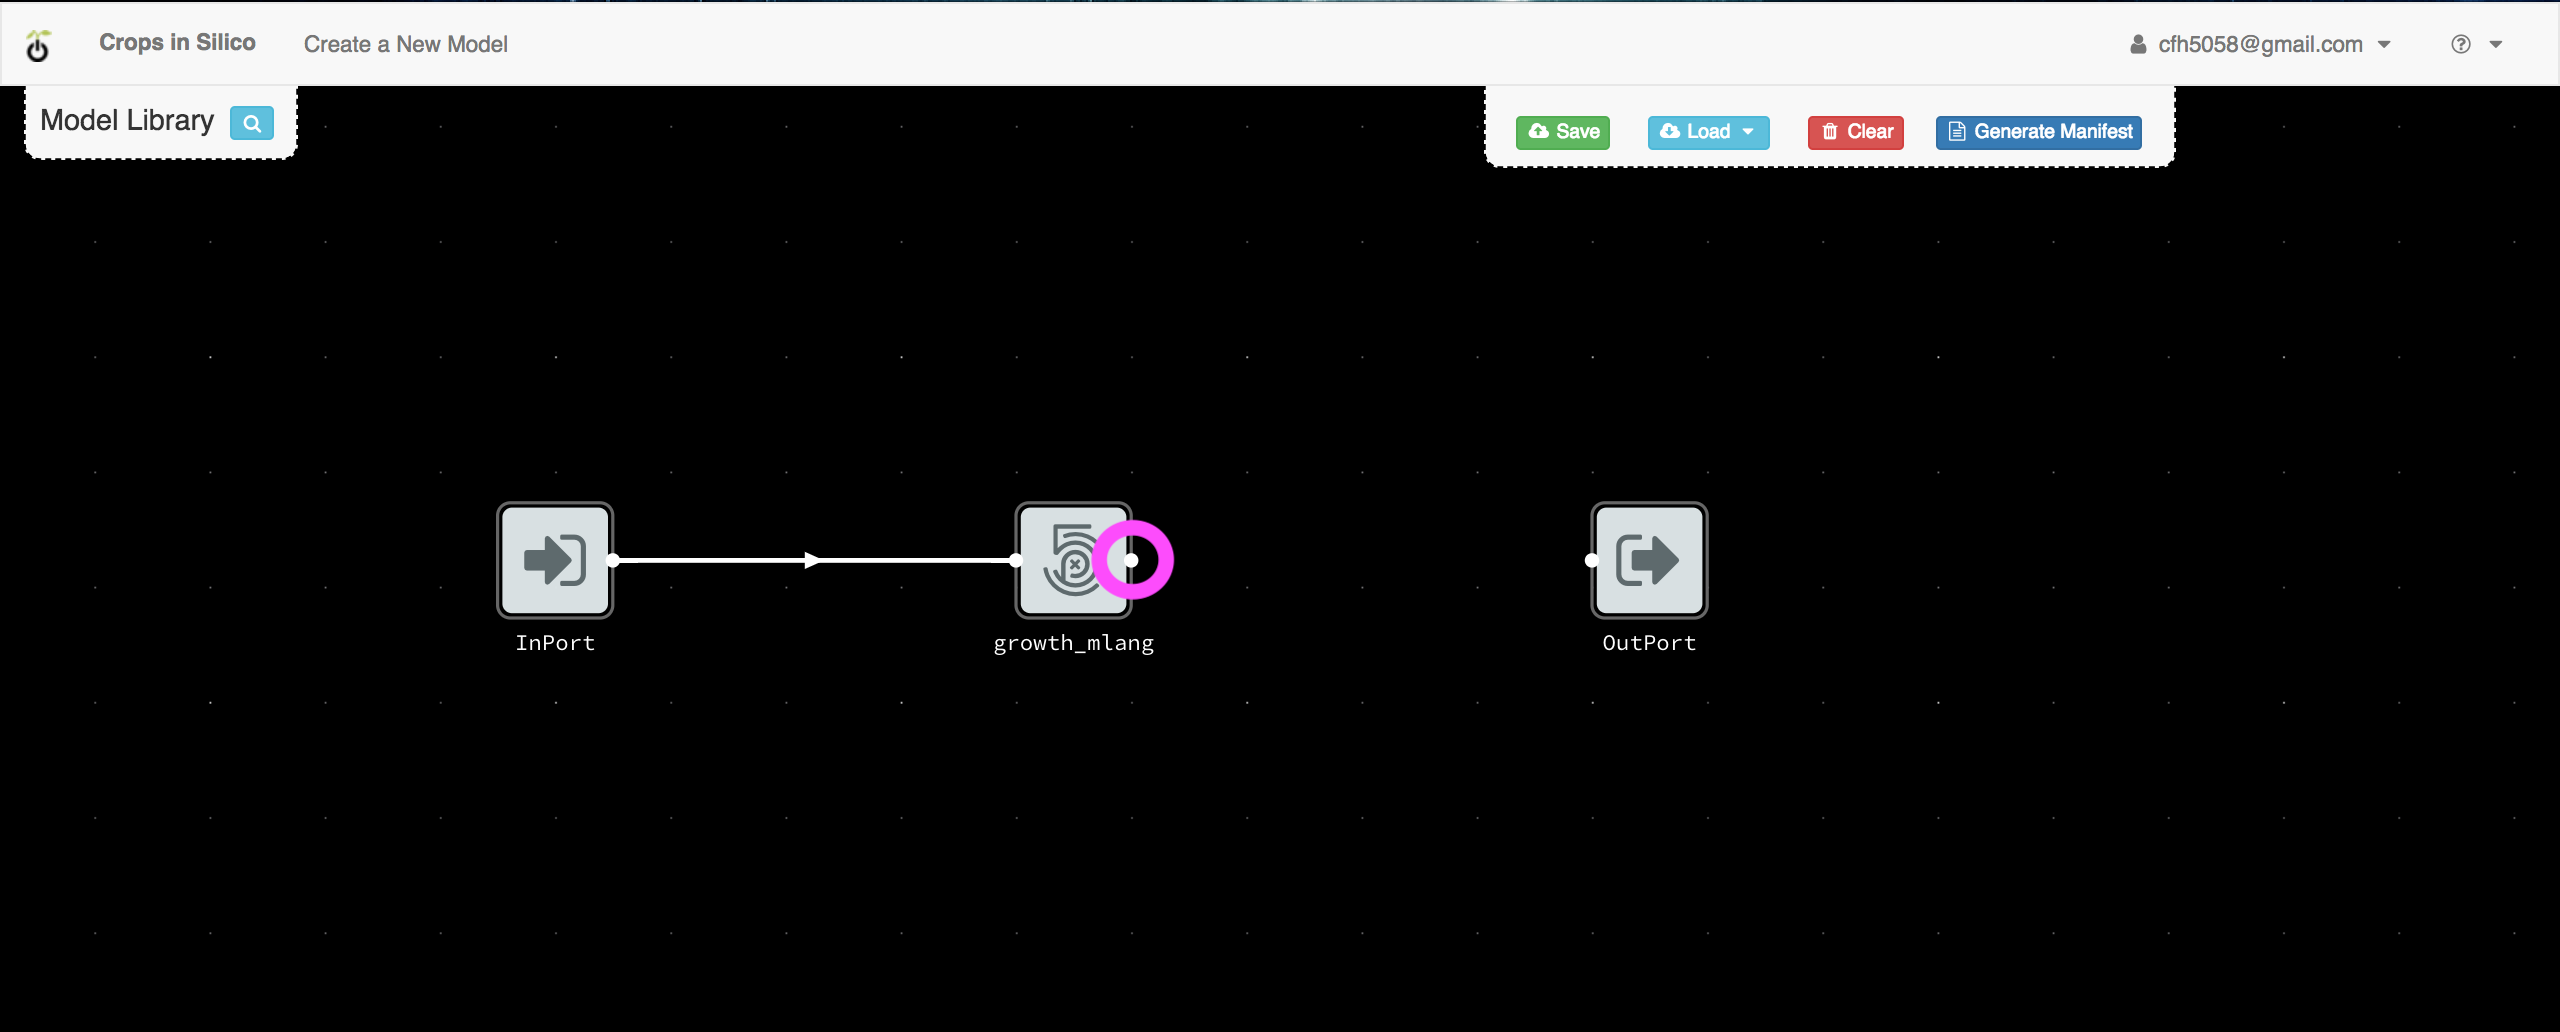
and then click on the input port’s dot.
Creating the YAML
Once you are finished creating your input and output connections, you can
use the interface to create your YAML file. If you click the Generate Manifest
button,
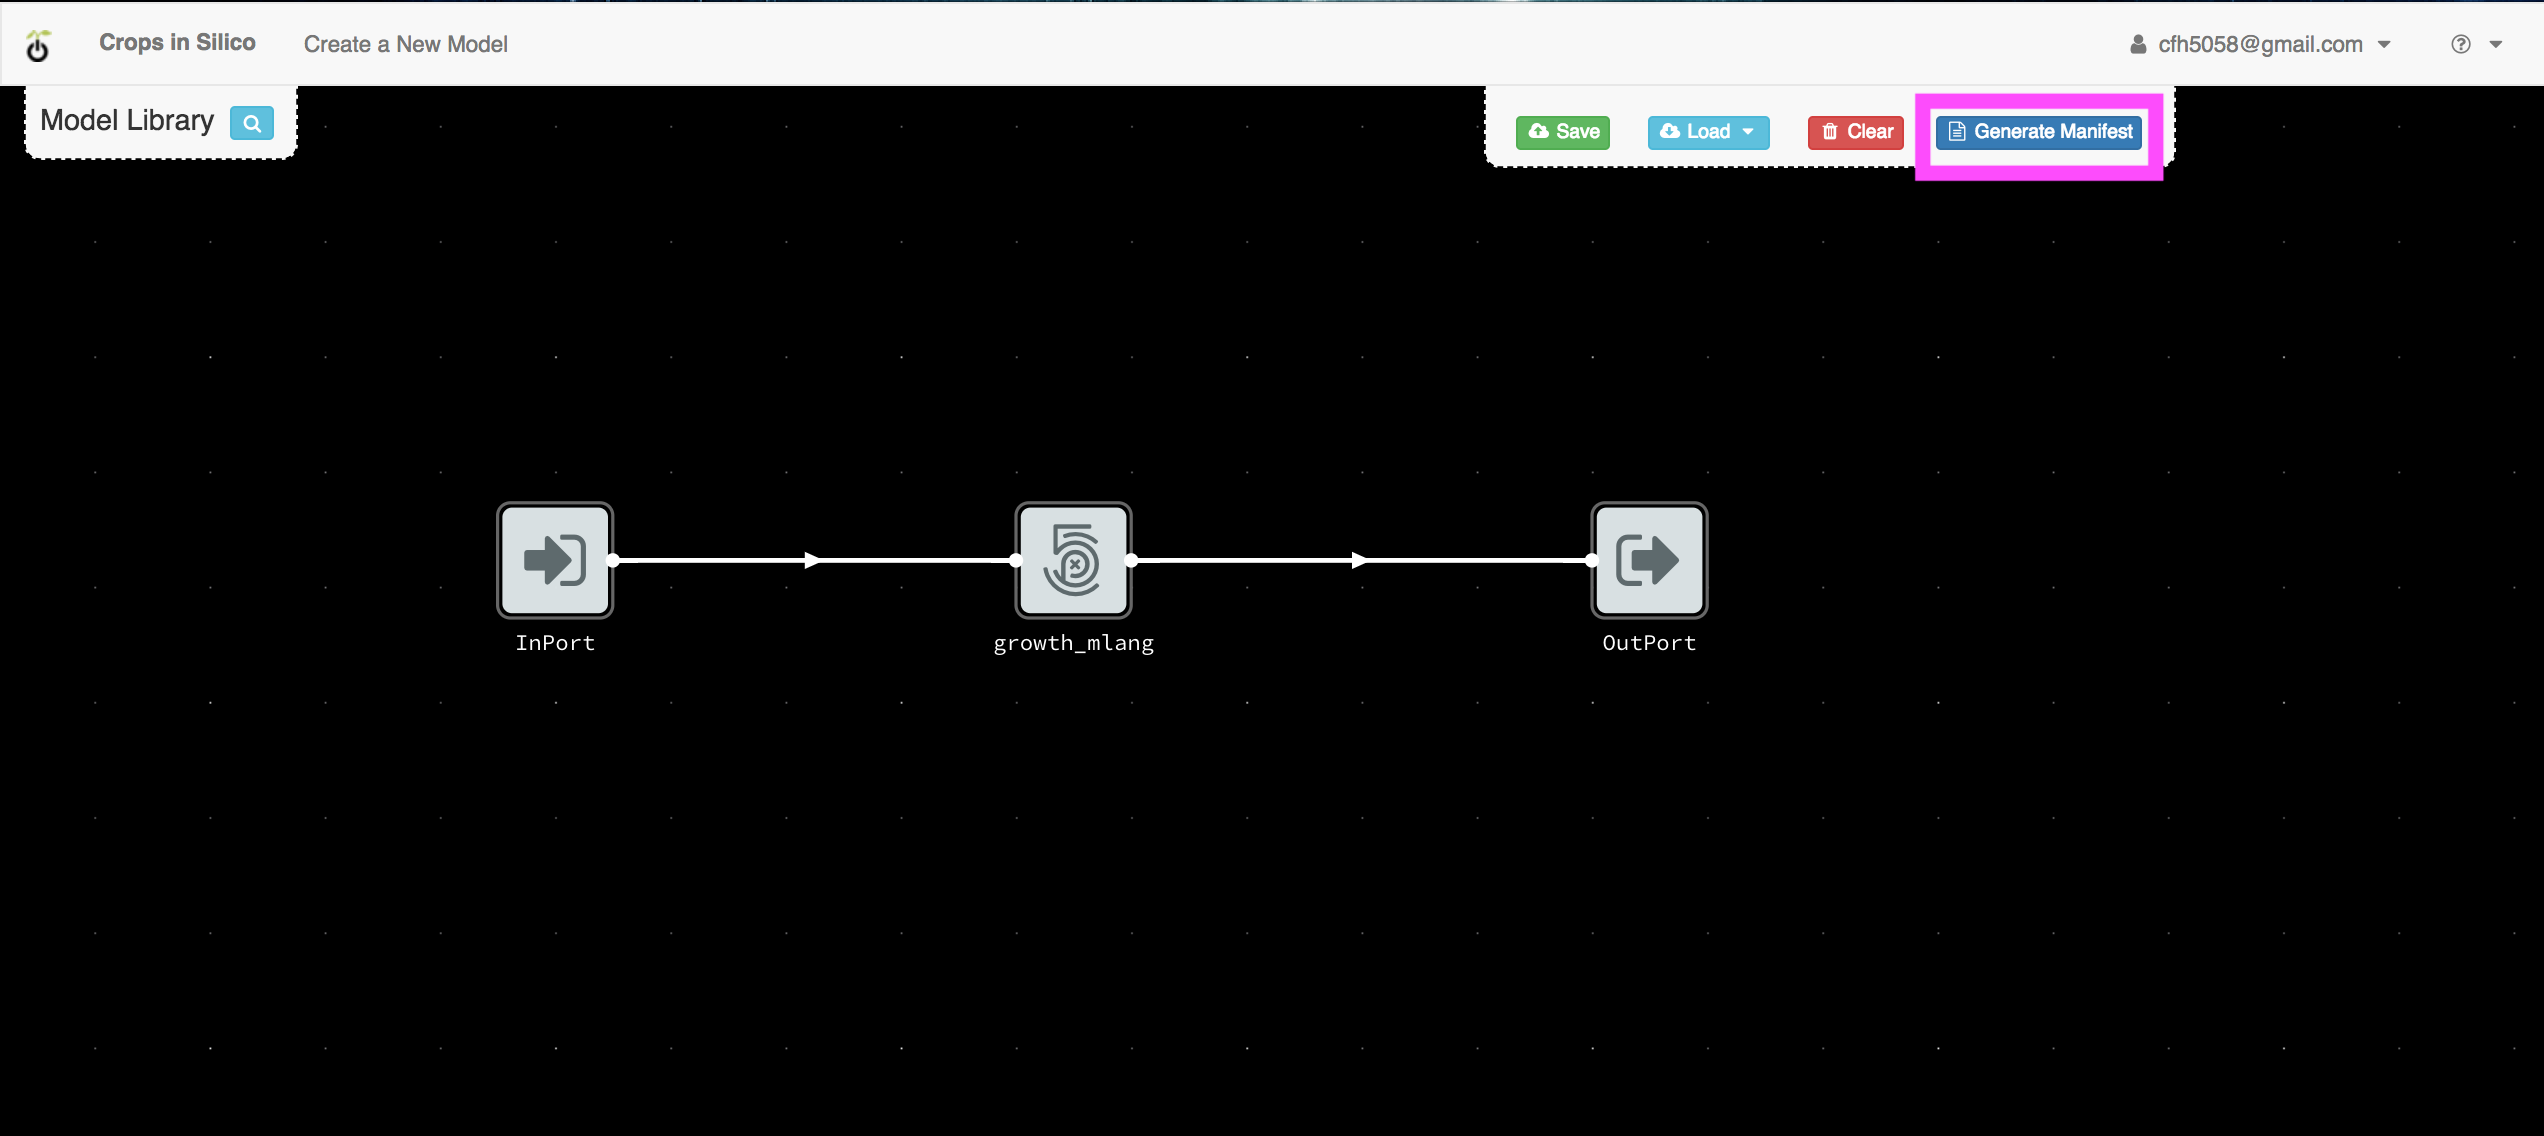
the interface will compile the necessary contents of the YAML file for running your model with connections to the file.
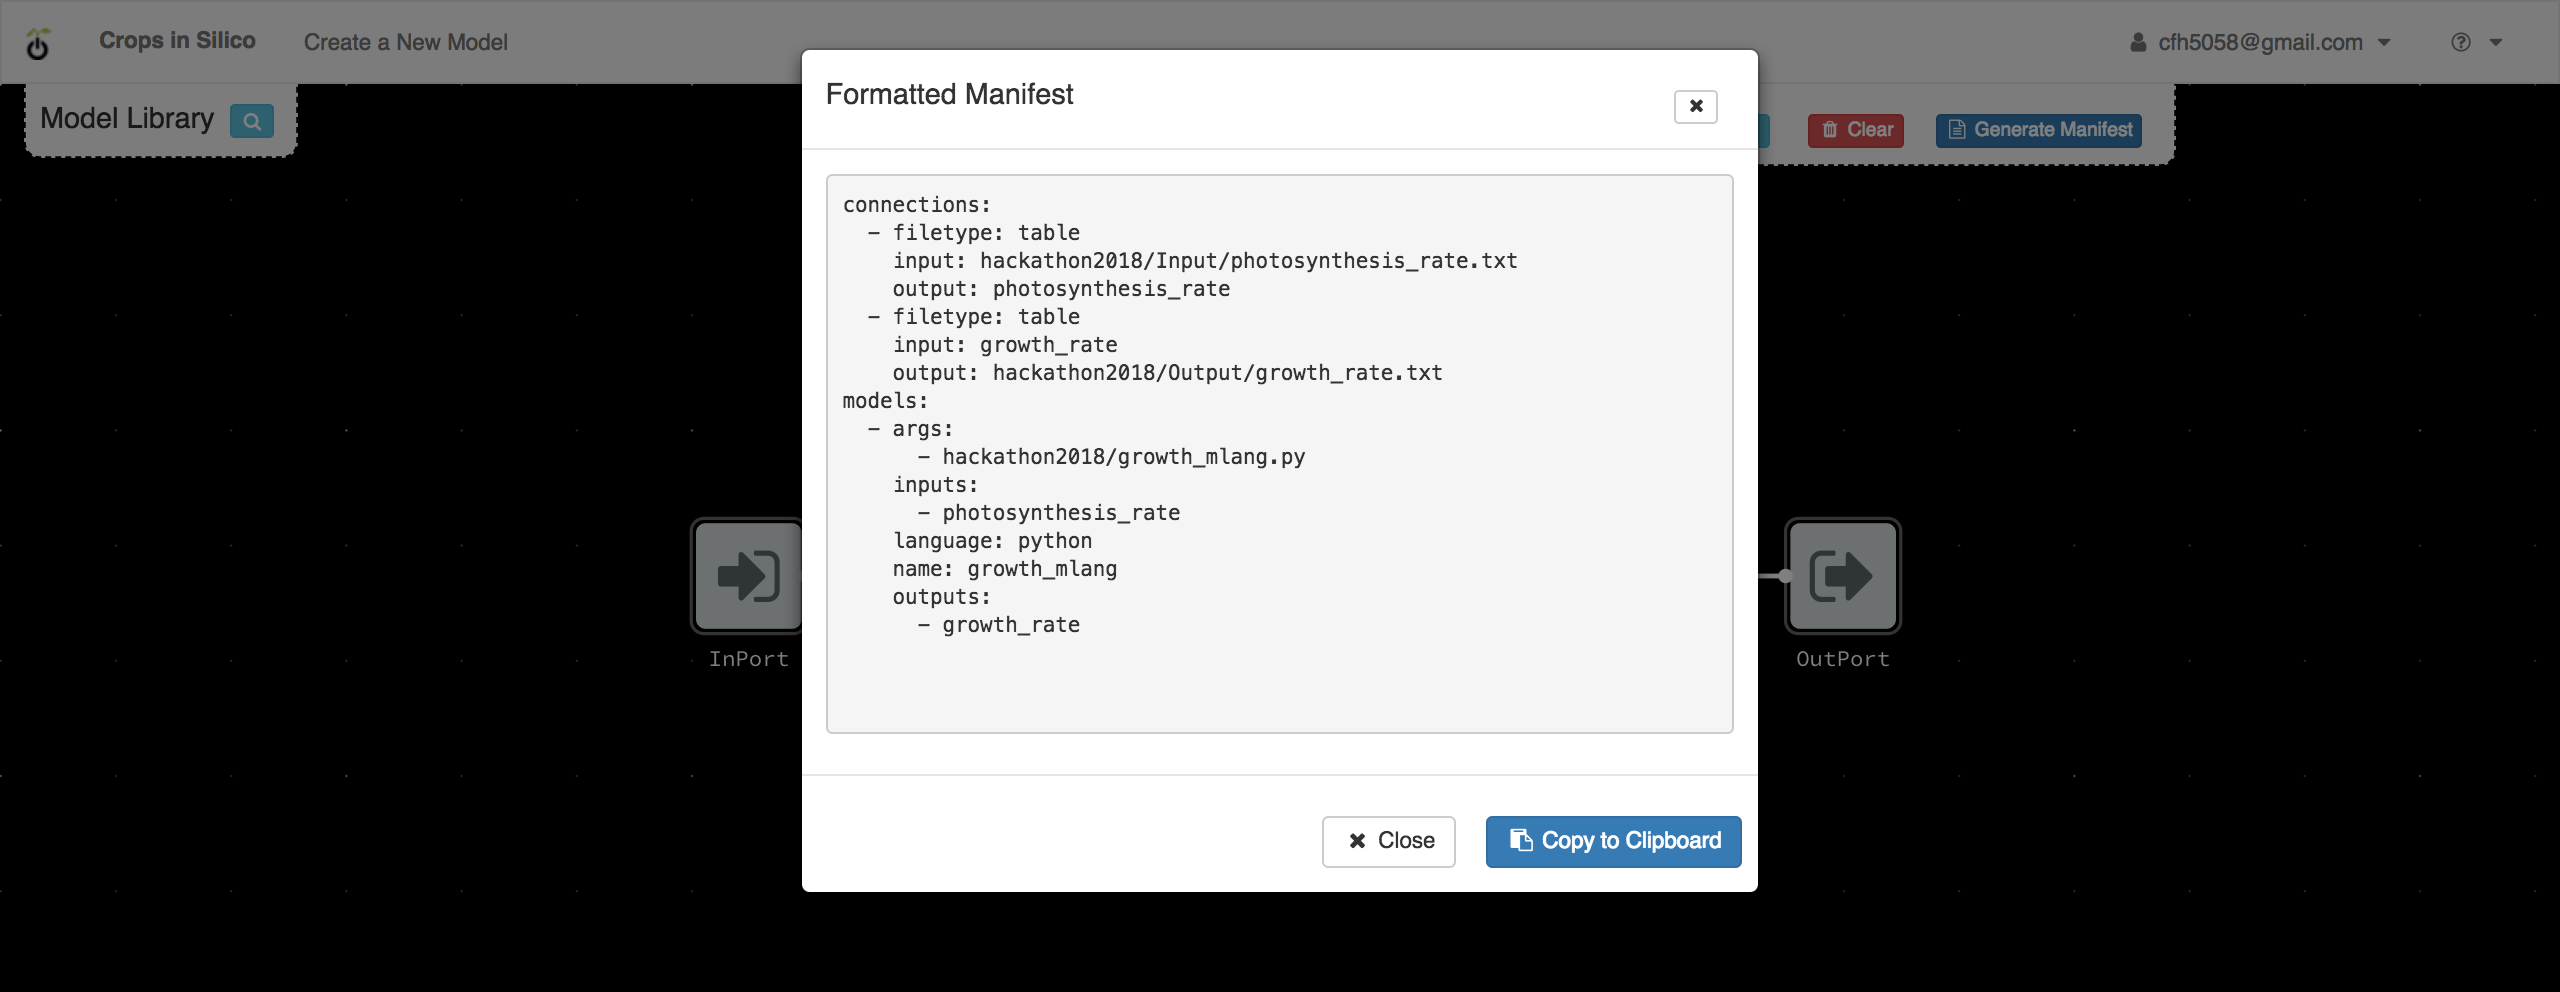
You can then copy that information to your clipboard and past it into a new file
called growth_to_file.yml in the cis_home directory.
Running the Model-to-File Integration
You can run the integration you just created by executing:
$ cisrun growth_to_file.yml
from the cis_home directory. This will output information on the
calculated growth rates to the screen and generate the output file
hackathon2018/Output/growth_rate.txt. If the model ran correctly, the output file
should look like this:
# %f
2.500000
3.500000
10.000000